Registration and Setup
How to connect, set up, and register your new Hubitat Elevation hub
Registration and Setup
Thank you for purchasing Hubitat Elevation. Before you can begin creating home automation that is local, reliable, fast and private, you'll need to complete a few simple setup and registration steps.
Getting to know Hubitat Elevation®
Your kit includes the following:
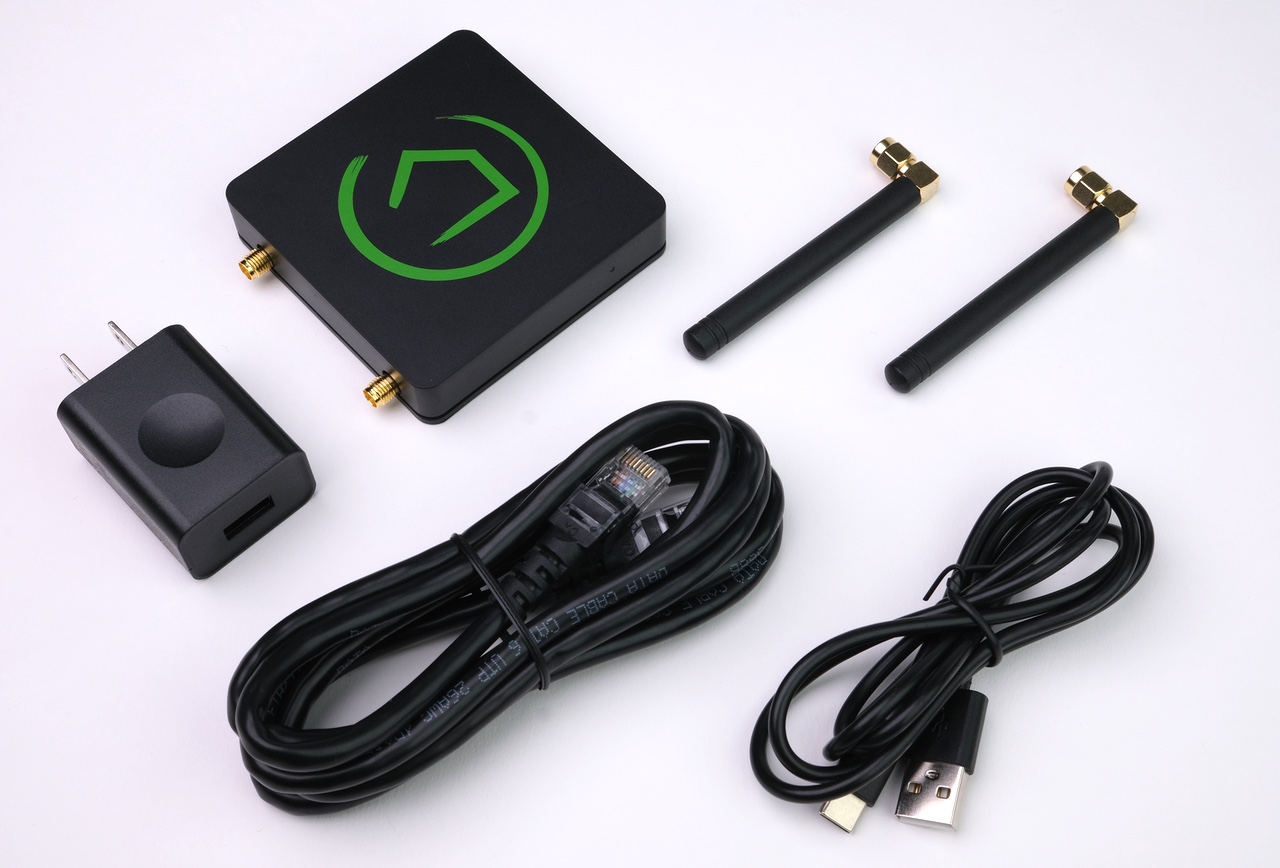
- The Hubitat Elevation hub, with integrated Zigbee and Z-Wave radios to communicate with your devices
- Antennas for Zigbee and Z-Wave
- "Get Started" card (continue here, scan the code, or go to go.hubitat.com yourself to get started!)
- USB-A to USB-C cable
- 5V power adapter
- Ethernet cable
NOTE: The above applies to the model C-8 and C-8 Pro hubs. Users with a model C-7 (or older) hub will not have external antennas and will use micro-USB rather than USB-C for power on the hub.
Connect your hub
Let's get started by finding a location that is suitable for the best experience possible.
- Your new Hubitat Elevation hub uses primarily Zigbee and Z-Wave technology to communicate with compatible smart home devices.
- These radio signals can be blocked or weakened by building materials and large metal objects.
- See the How to Build a Solid Zigbee Mesh and How to Build a Solid Z-Wave Mesh documents for more information.
- For optimal performance, choose a location as close to the center of your home as possible and free from metal obstructions.
We recommend http://go.hubitat.com to get started (especially for new model C-8 users), but you can also read the steps below.
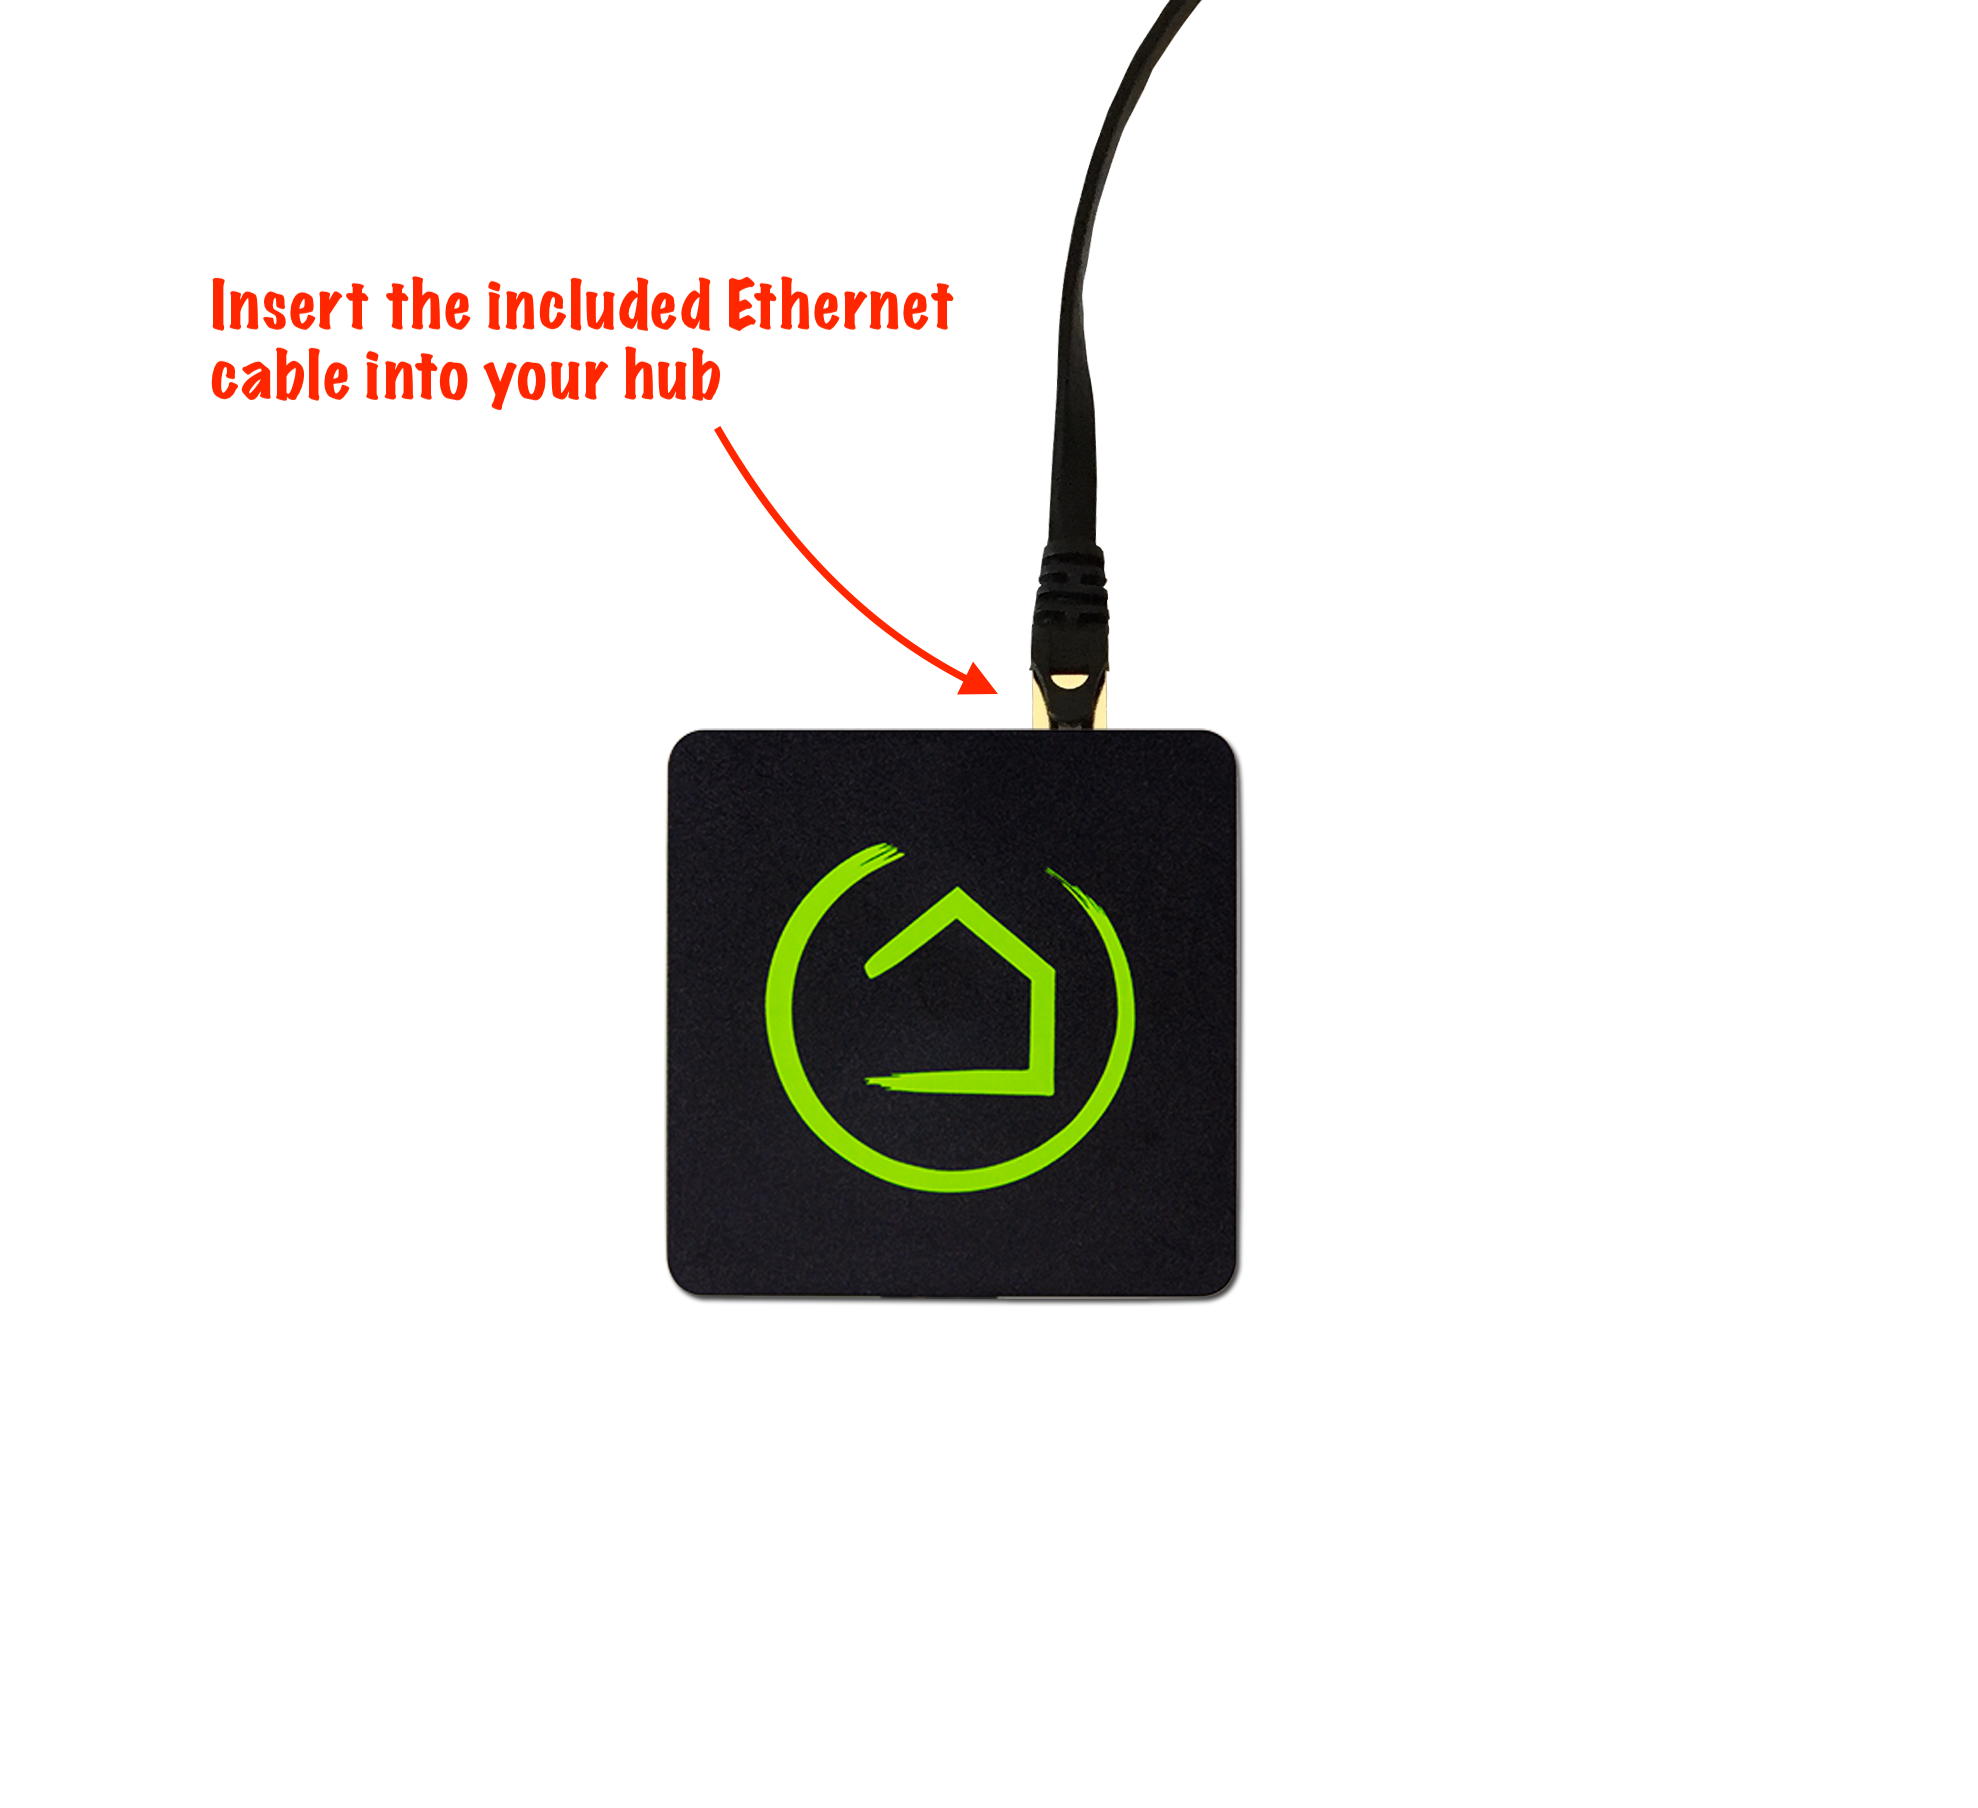
- To connect with a wired connection (recommended), insert the included Ethernet cable into your Hubitat Elevation®
WARNING: Your Hubitat Elevation hub DOES NOT support PoE (Power over Ethernet). Attaching your hub directly to a PoE port may cause permanent damage and void the warranty.
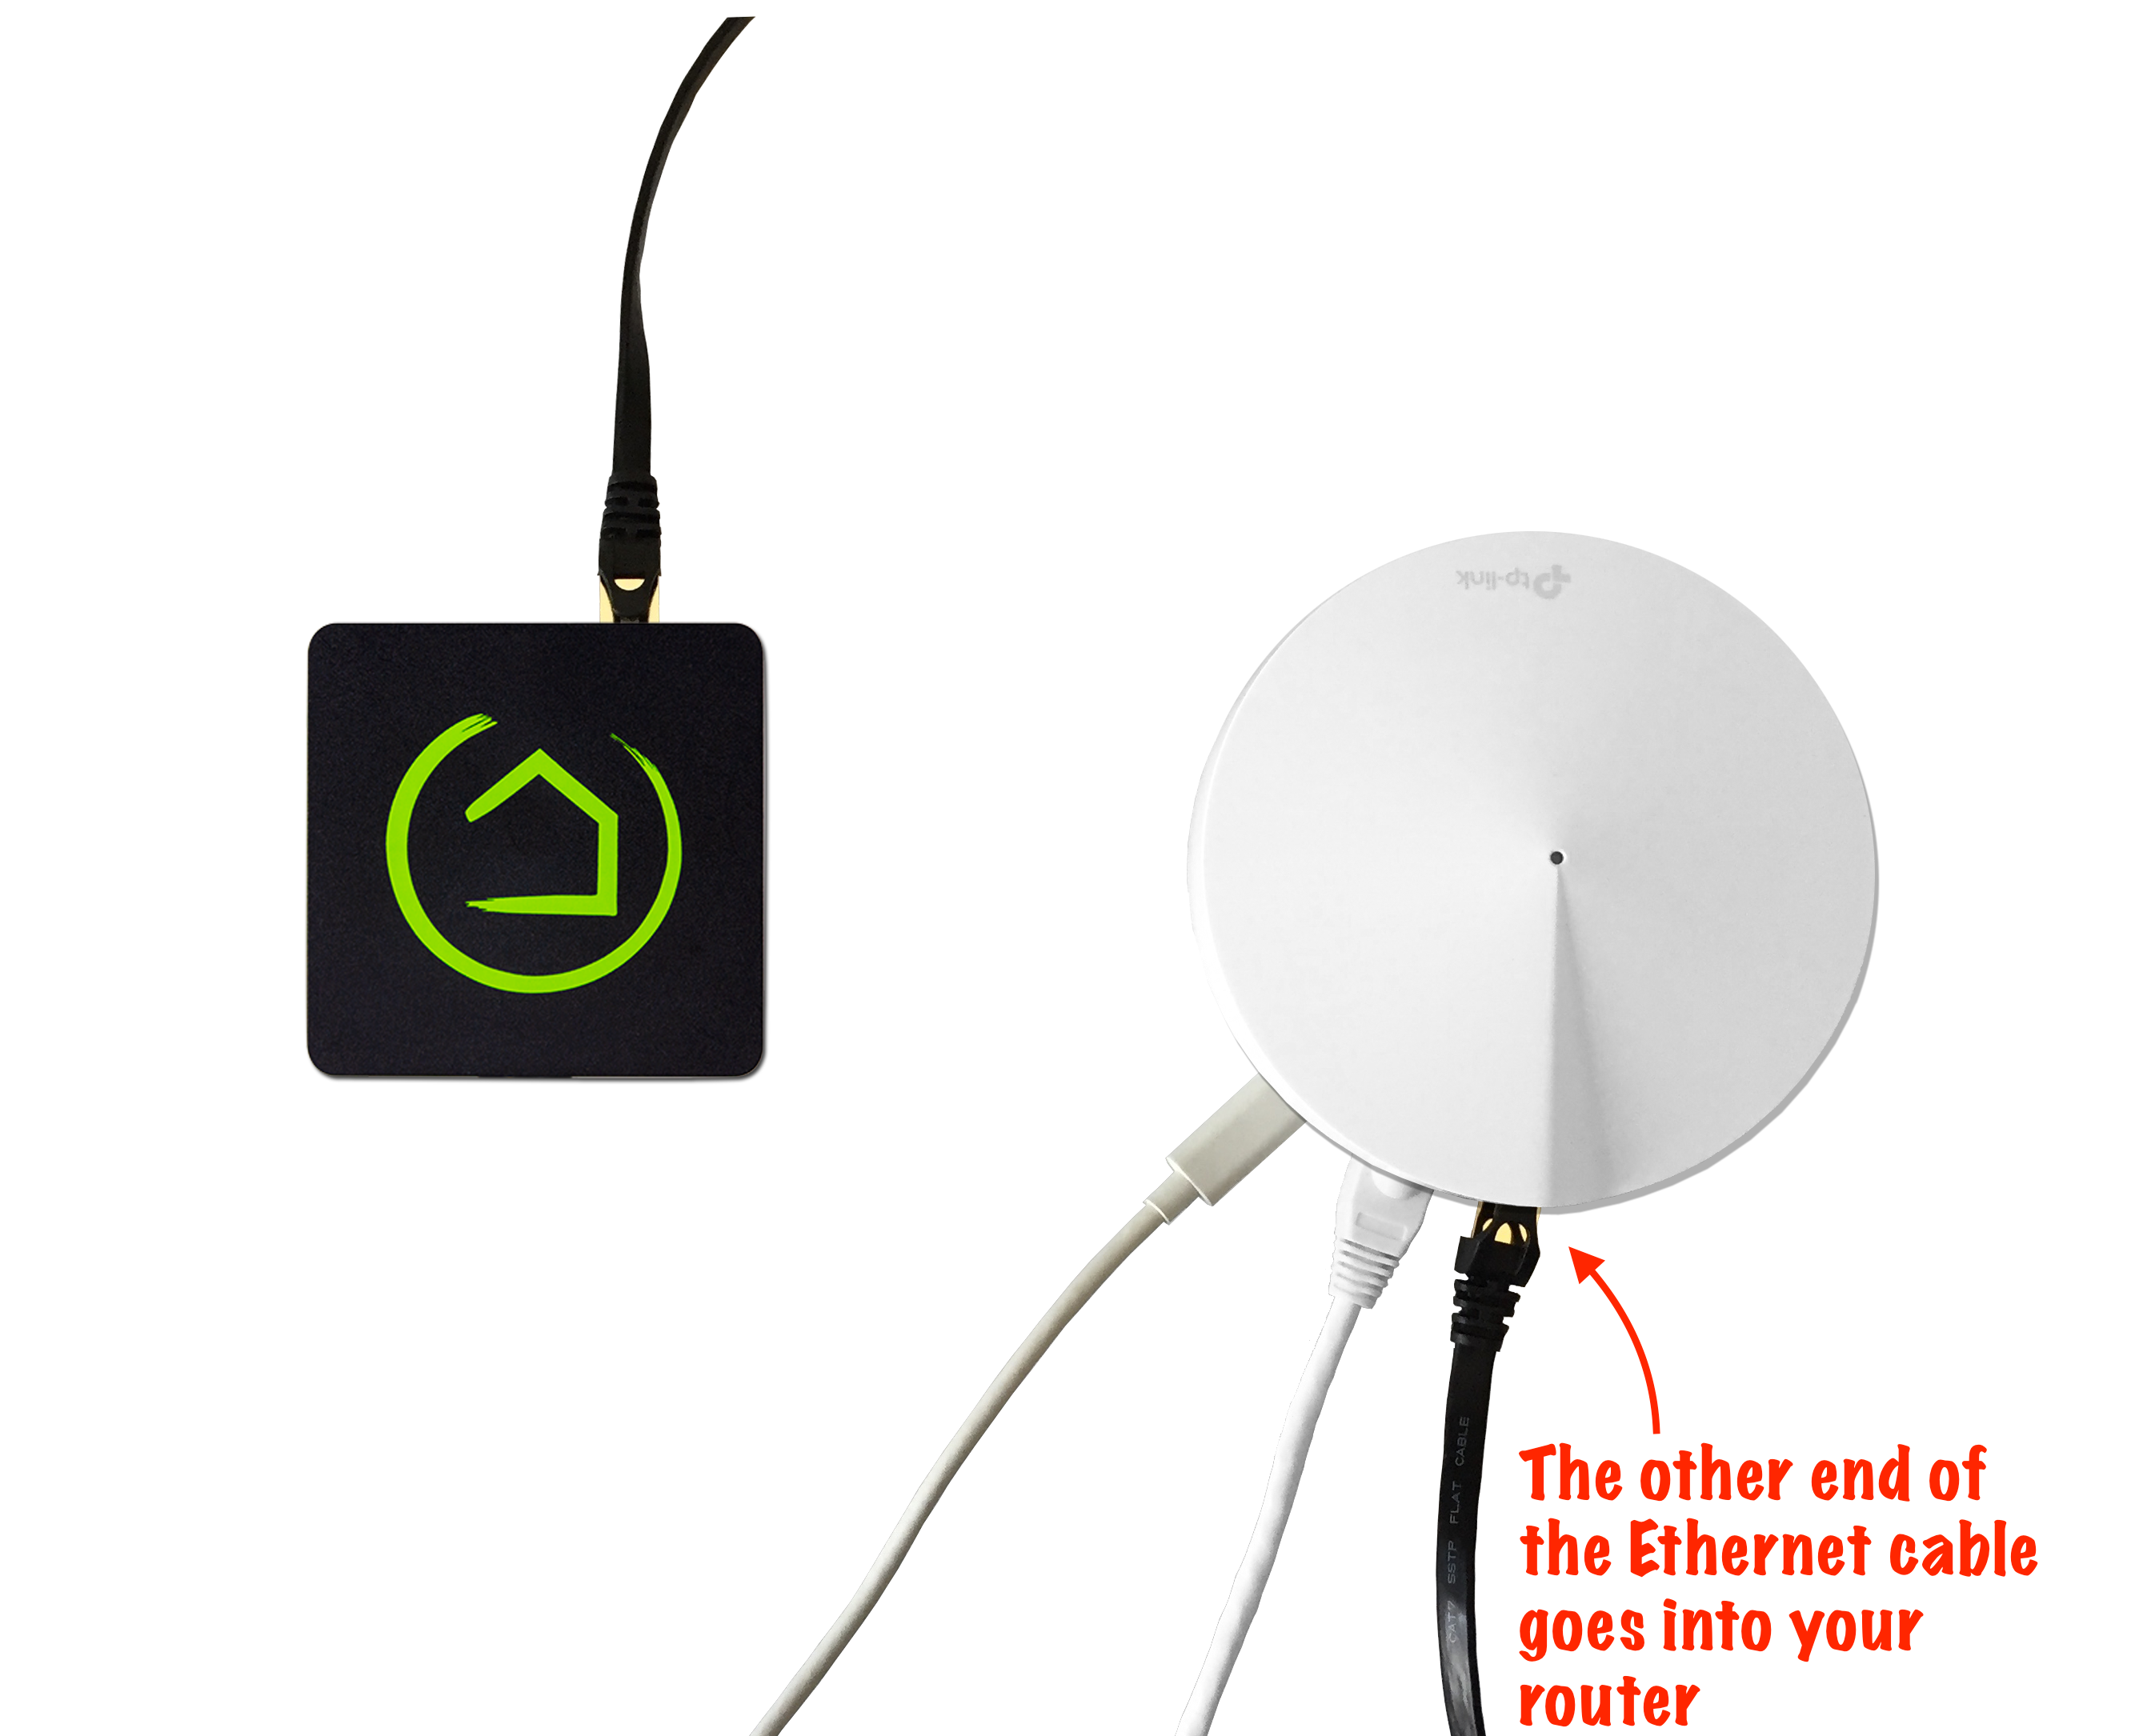
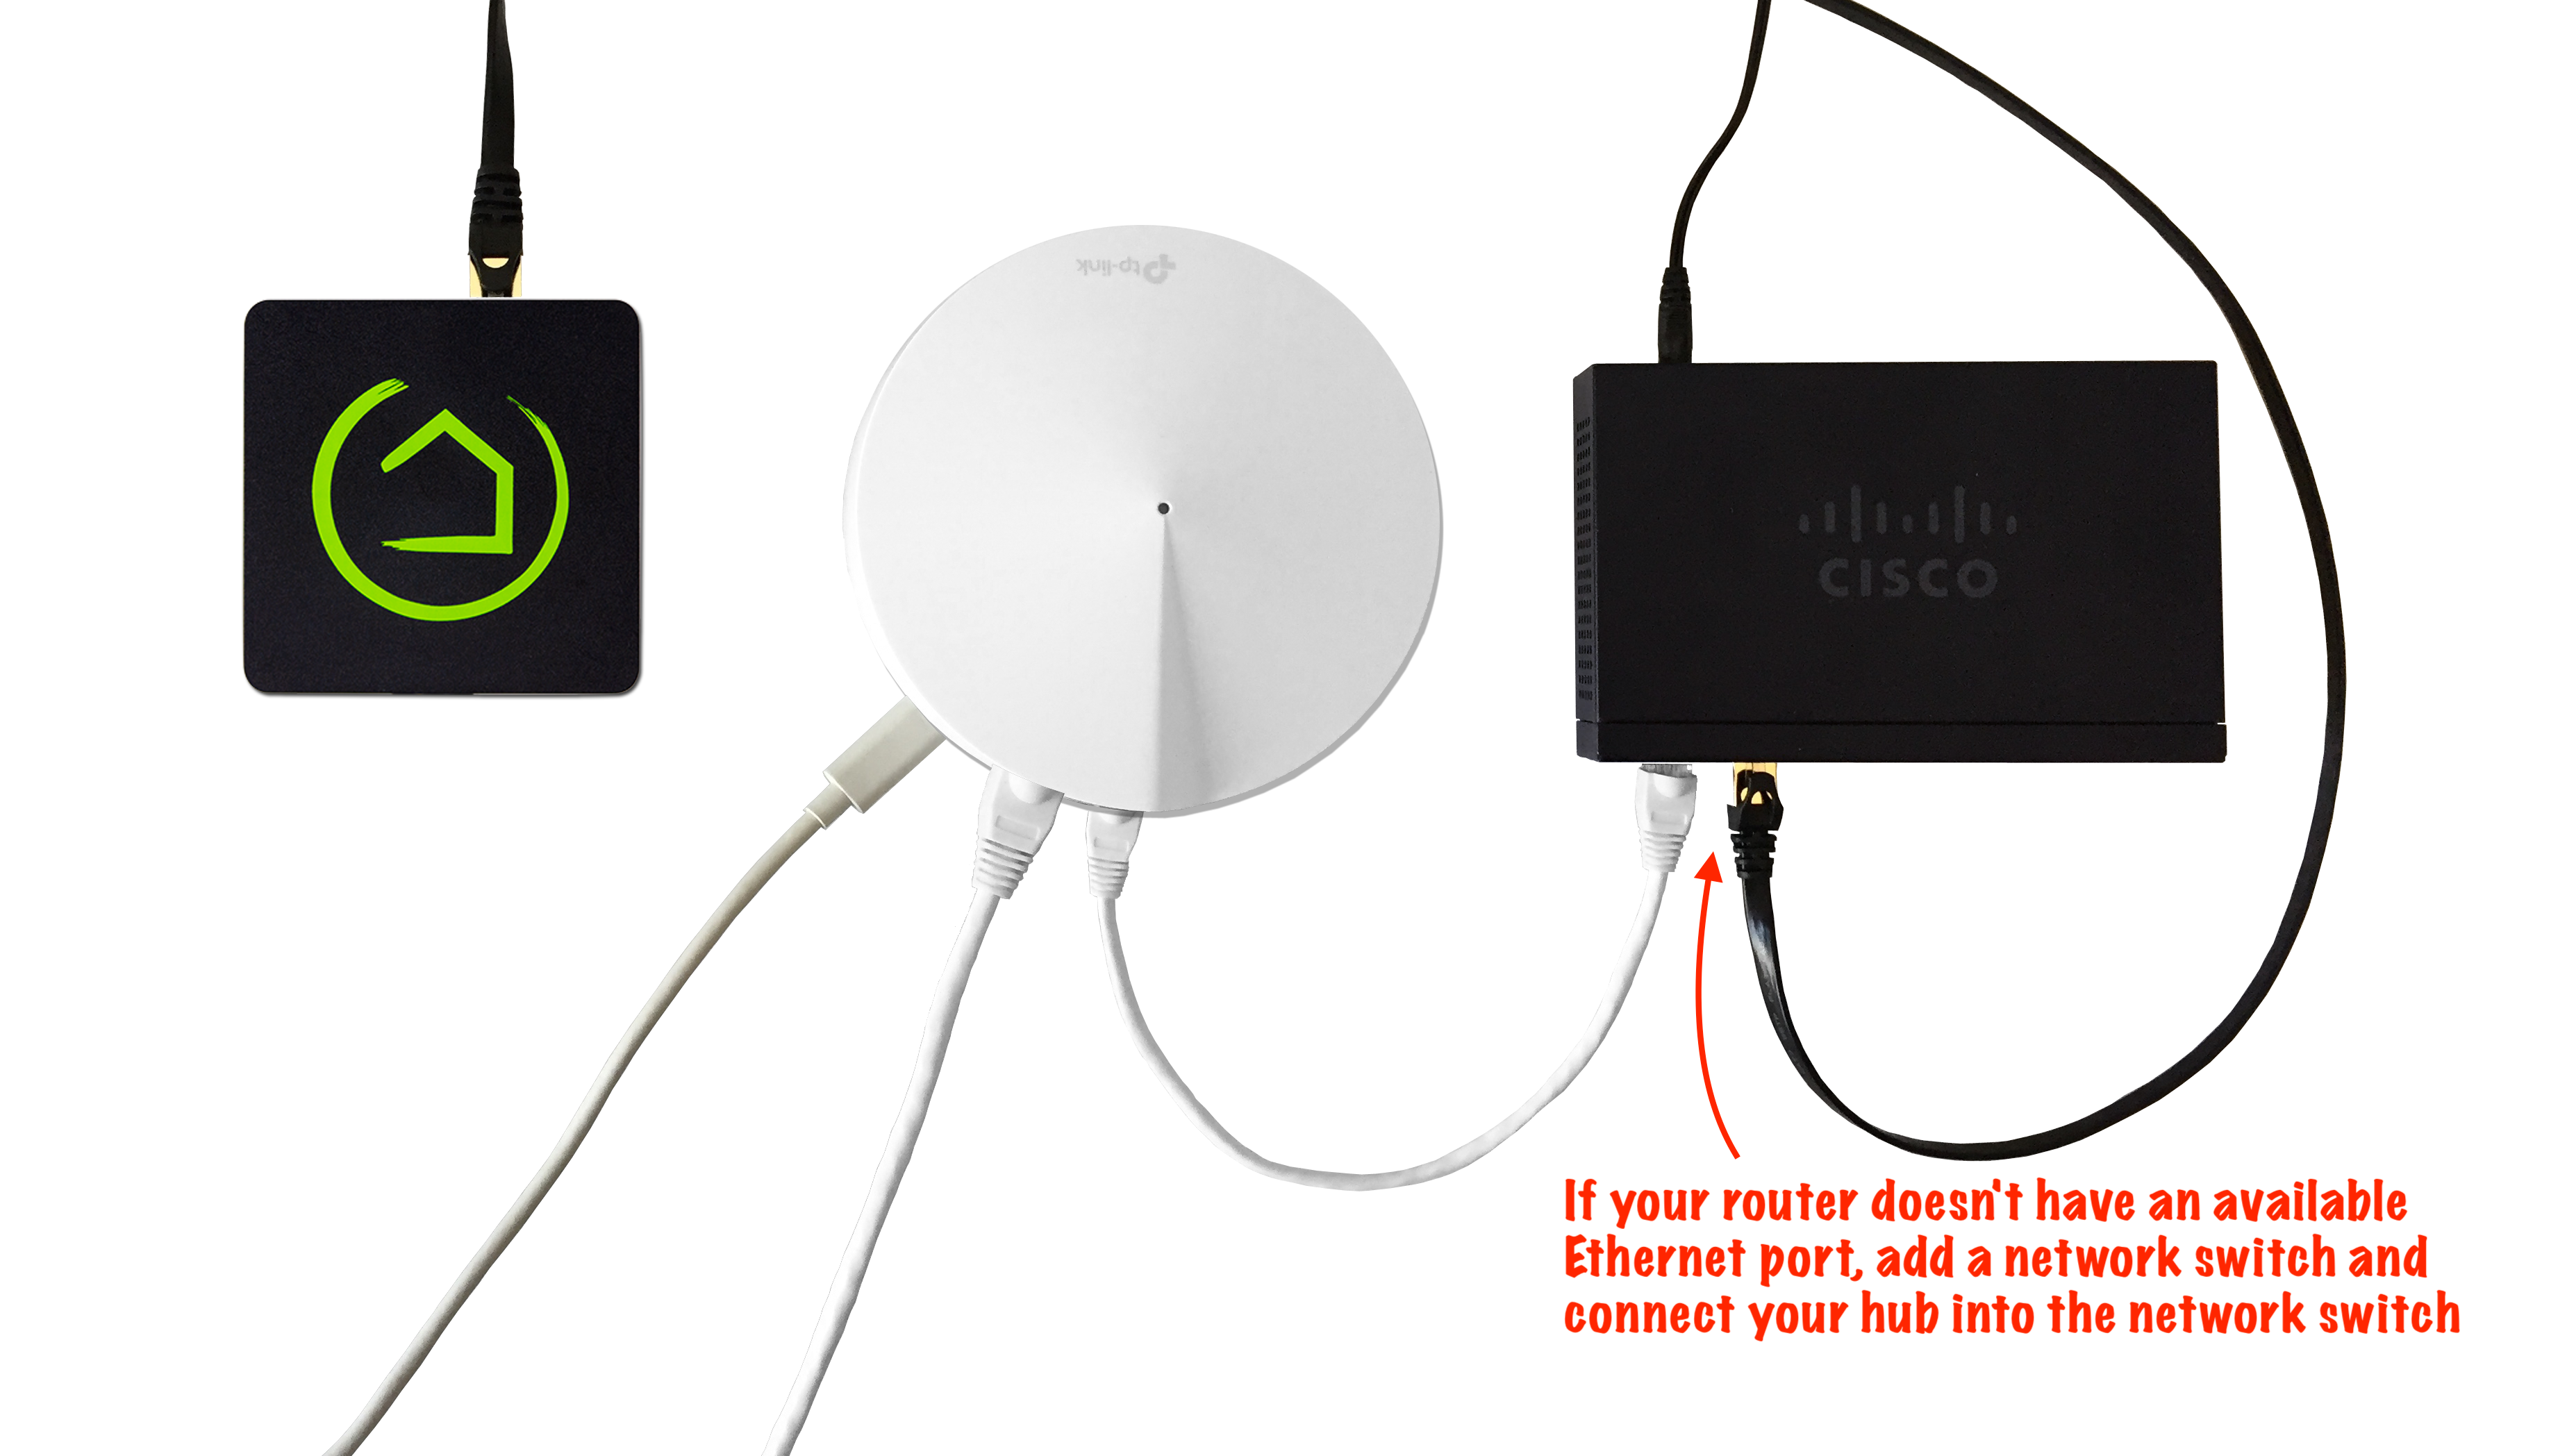
- Plug the other end of the Ethernet cable into an available LAN port on your router or modem/router combination device from your Internet service provider. If there are no available Ethernet ports on your router (or another location is better for your hub), Wi-Fi connectivity is also available on model C-8 during setup; see below.
-
Insert the included USB-C cable into your Hubitat Elevation hub and connect the other end to the cable to the included power adapter.
-
Plug in the power adapter to begin the boot process.
NOTE: The light on your hub will glow blue during boot up and remain that way until the hub has fully booted. Once your hub has finished booting and is ready for operation, the light will glow green.
Connecting via Wi-Fi
If a wired network port is not available or another location works better for your hub, Wi-Fi connectivity is also available during setup and regular use (model C-8 and later only). Instead of steps 2 and 3 above:
- Connect the USB-C cable (but no network cable) and wait for the hub to finish booting.
- The hub will broadcast a network called MyNewHubitat when no wired connection is present. Connect to this network using your computer or mobile device, follow the prompts in the "captive portal" to configure Wi-Fi on the hub.
- Switch back to your regular Wi-Fi network on your device (if it does not do so automatically) and proceed with setting up and registering the hub as below.
NOTES:
- Models C-5 and C-7 can also use the Networking settings to add a compatible WiFi adapter (not included) after initial setup; however, a wired connection is required for initial configuration with these older models.
- If you have already set up your hub via Ethernet and want to switch to Wi-Fi later, that is also possible. All models C-5 and later can use the Network Setup page in Settings to configure Wi-Fi connectivity (compatible adapter required for models before C-8).
- A wired connection is recommended if possible for best reliability.
Reserve an IP address
- It is recommended that you reserve an IP address for your hub in the DHCP reservation settings of your router. Consult your router manufacturer instructions to learn how.
- Reserving an IP address in your router will ensure you are always able to access your hub from the same IP address, and other connected devices on your network will be able to always find your hub.
- Alternatively, you may specify a static IP address using Settings > Networking. This is available on model C-5 and later hubs only.
Set up and register your hub
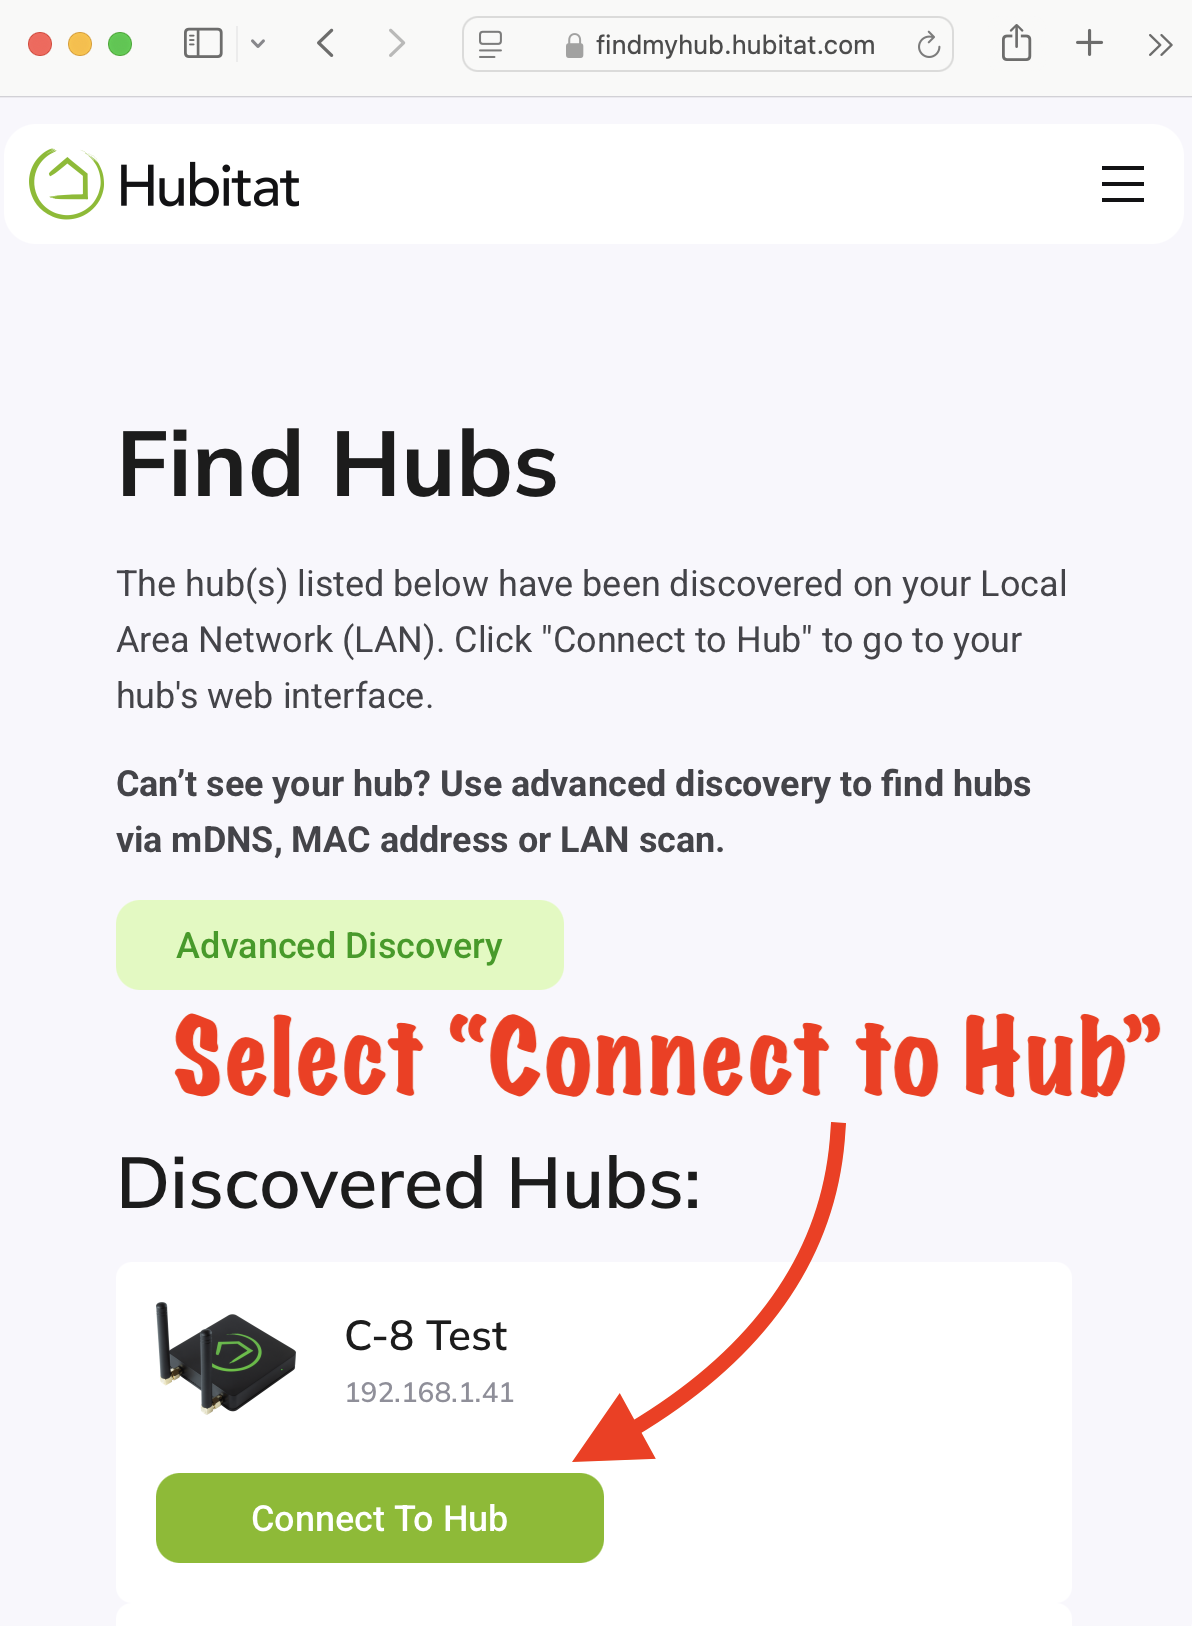
- Visit findmyhub.hubitat.com from your web browser to automatically search for your Hubitat Elevation hub on your local network. Your hub should appear in the list of hubs with the name My New Hub. (Alternatively, scan the QR code on the documentation insert that came with your hub, or visit go.hubitat.com and follow the prompts there, which — after finding your hub — will eventually continue with the below steps.)
Note: Microsoft Internet Explorer and Microsoft Edge (prior to the Chromium version) are not supported. Google Chrome is recommended for the best experience, but Firefox or Safari may also be used. If you experience issues with a supported browser, please try disabling third-party browser extensions.
IMPORTANT! Your computer or mobile device must be on the same LAN (Local Area Network) as your hub in order to register. If your hub does not appear, ensure you have your hub and computer or mobile device connected to the same router and network. Also make certain and they are not isolated by a Wi-Fi guest account. If your hub still does not appear, press the Advanced Discovery button to find hubs via mDNS, MAC address, or LAN scan.
-
Select the Connect to Hub button.
-
Select the Get Started button.
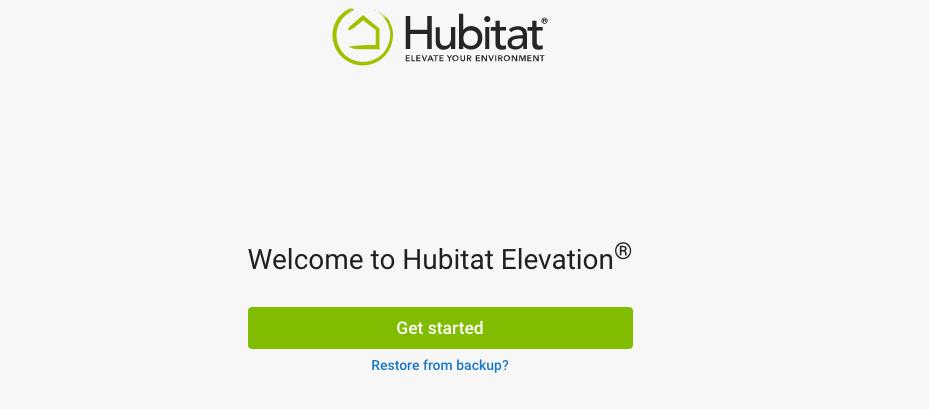
NOTE: If your "Get Started" page does not look like the above (it will have a green background with a white button instead), you should likely follow the old Registration and Setup (pre-firmware-2.3.1) document instead. Hubs shipped before approximately mid-2022 are likely to use this older process.
-
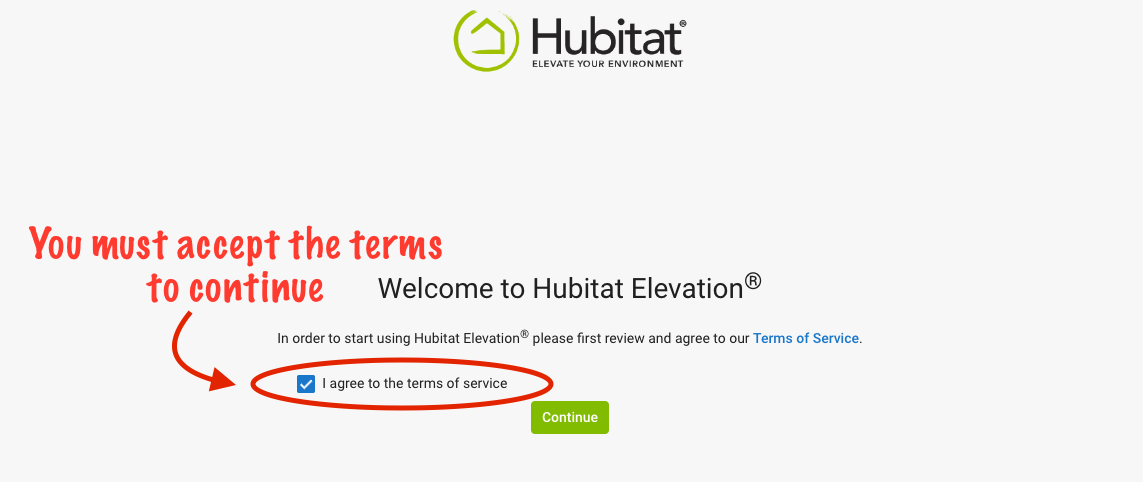
Next, you will be taken to the Terms of Service page. You must agree to the terms and check the box for the Continue button to appear. (NOTE: Some users may see an "Update hub firmware" page after completing this step, in which case you should select Update Now to ensure your hub is on the latest firmware, wait for the update to complete, then proceed with the next step.)
-
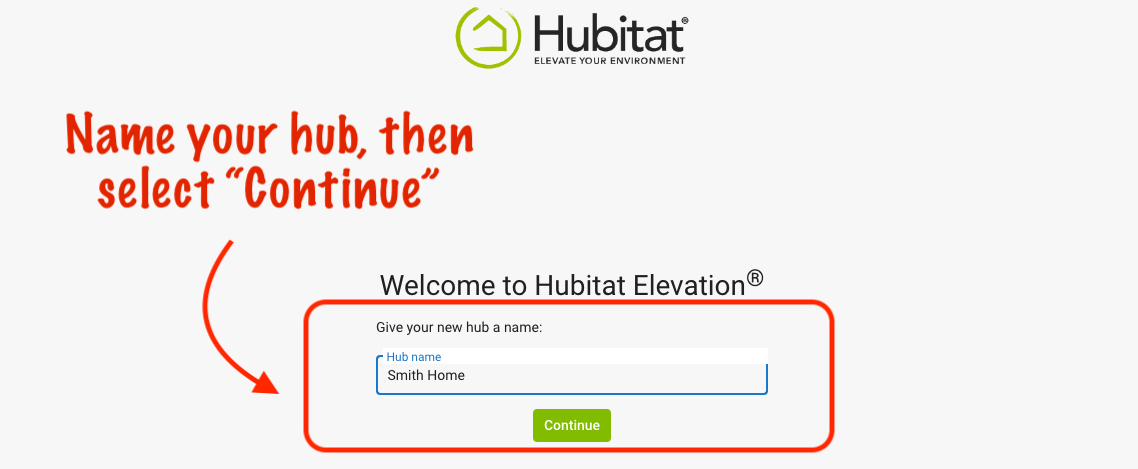
Give your hub a name of your choosing, perhaps based on its location (this is how it will appear on findmyhub.hubitat.com, the mobile app, and some places in the administrative interface).
-
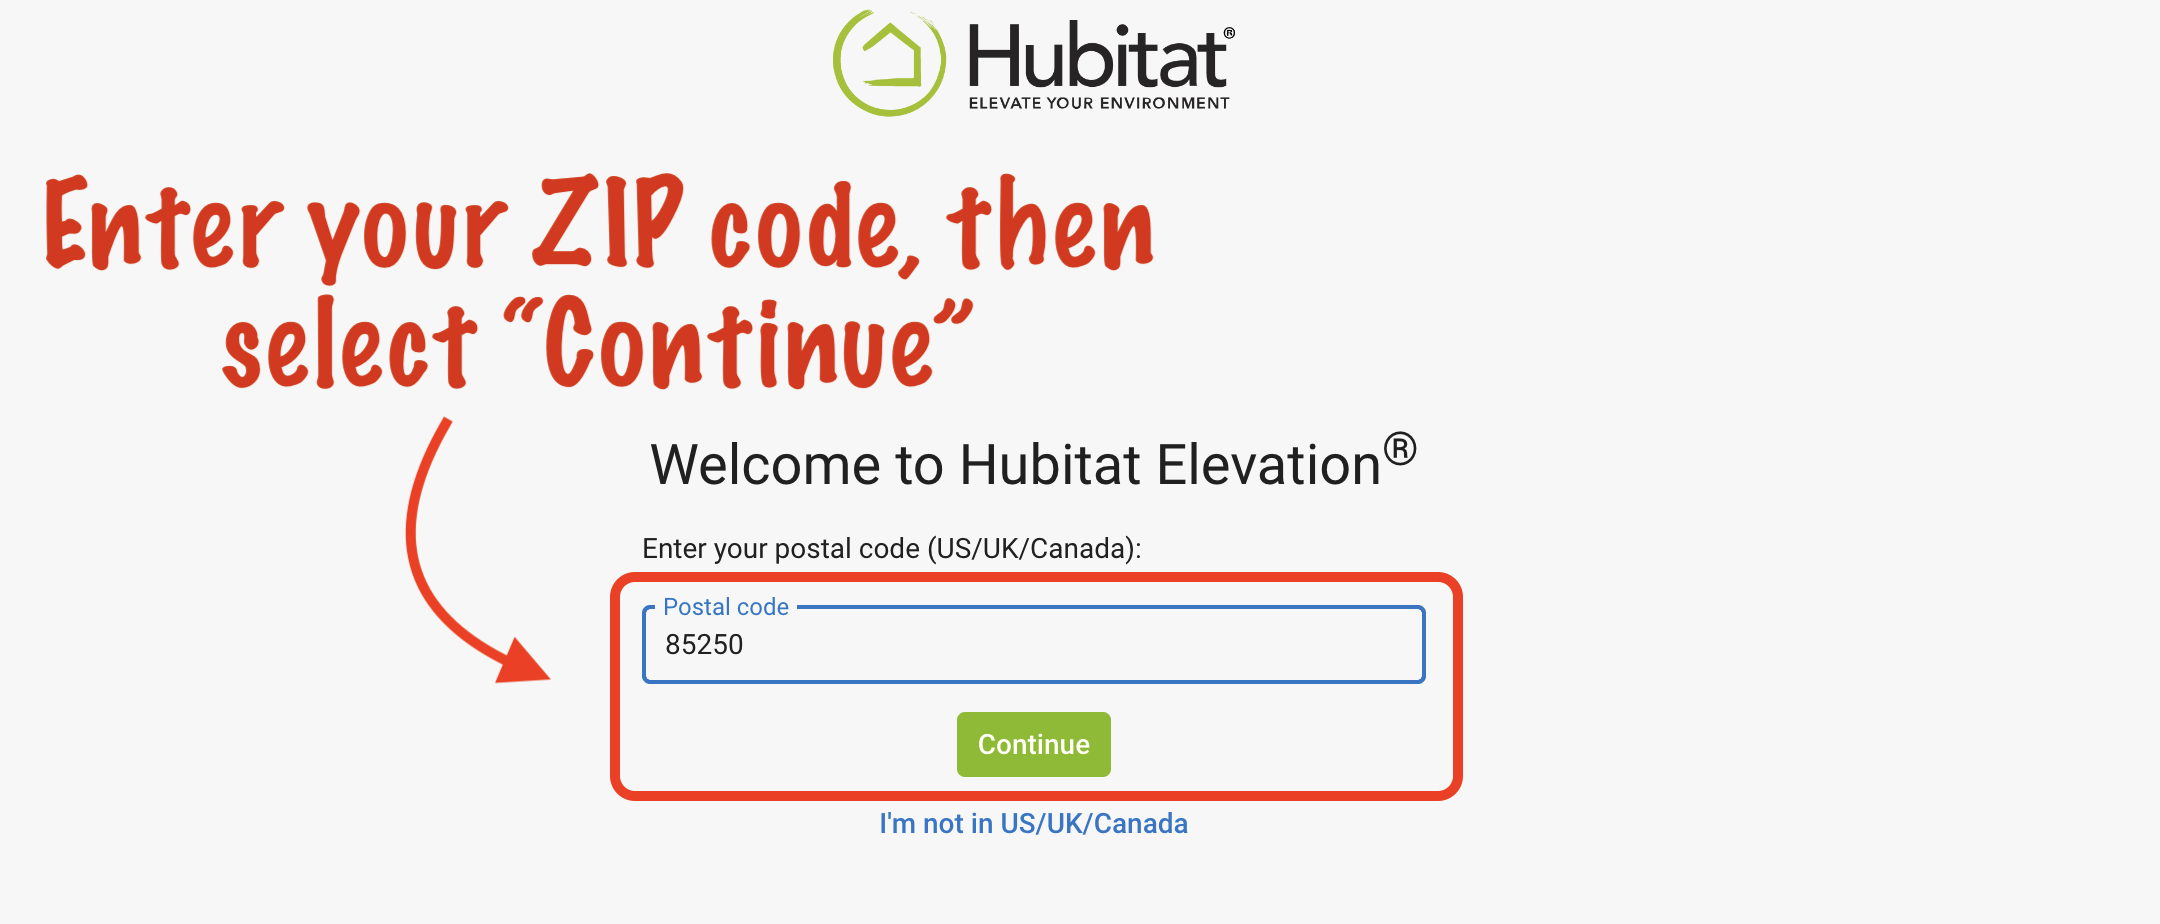
Enter your postal code if you are in the US, UK, or Canada; otherwise select the I'm not in the US/UK/Canada link to set your location and time zone manually. Entering your correct location will allow the hub to calculate the sunrise and sunset times for your location, which will enable certain scheduled automations to run when expected. Then, select Continue.
-
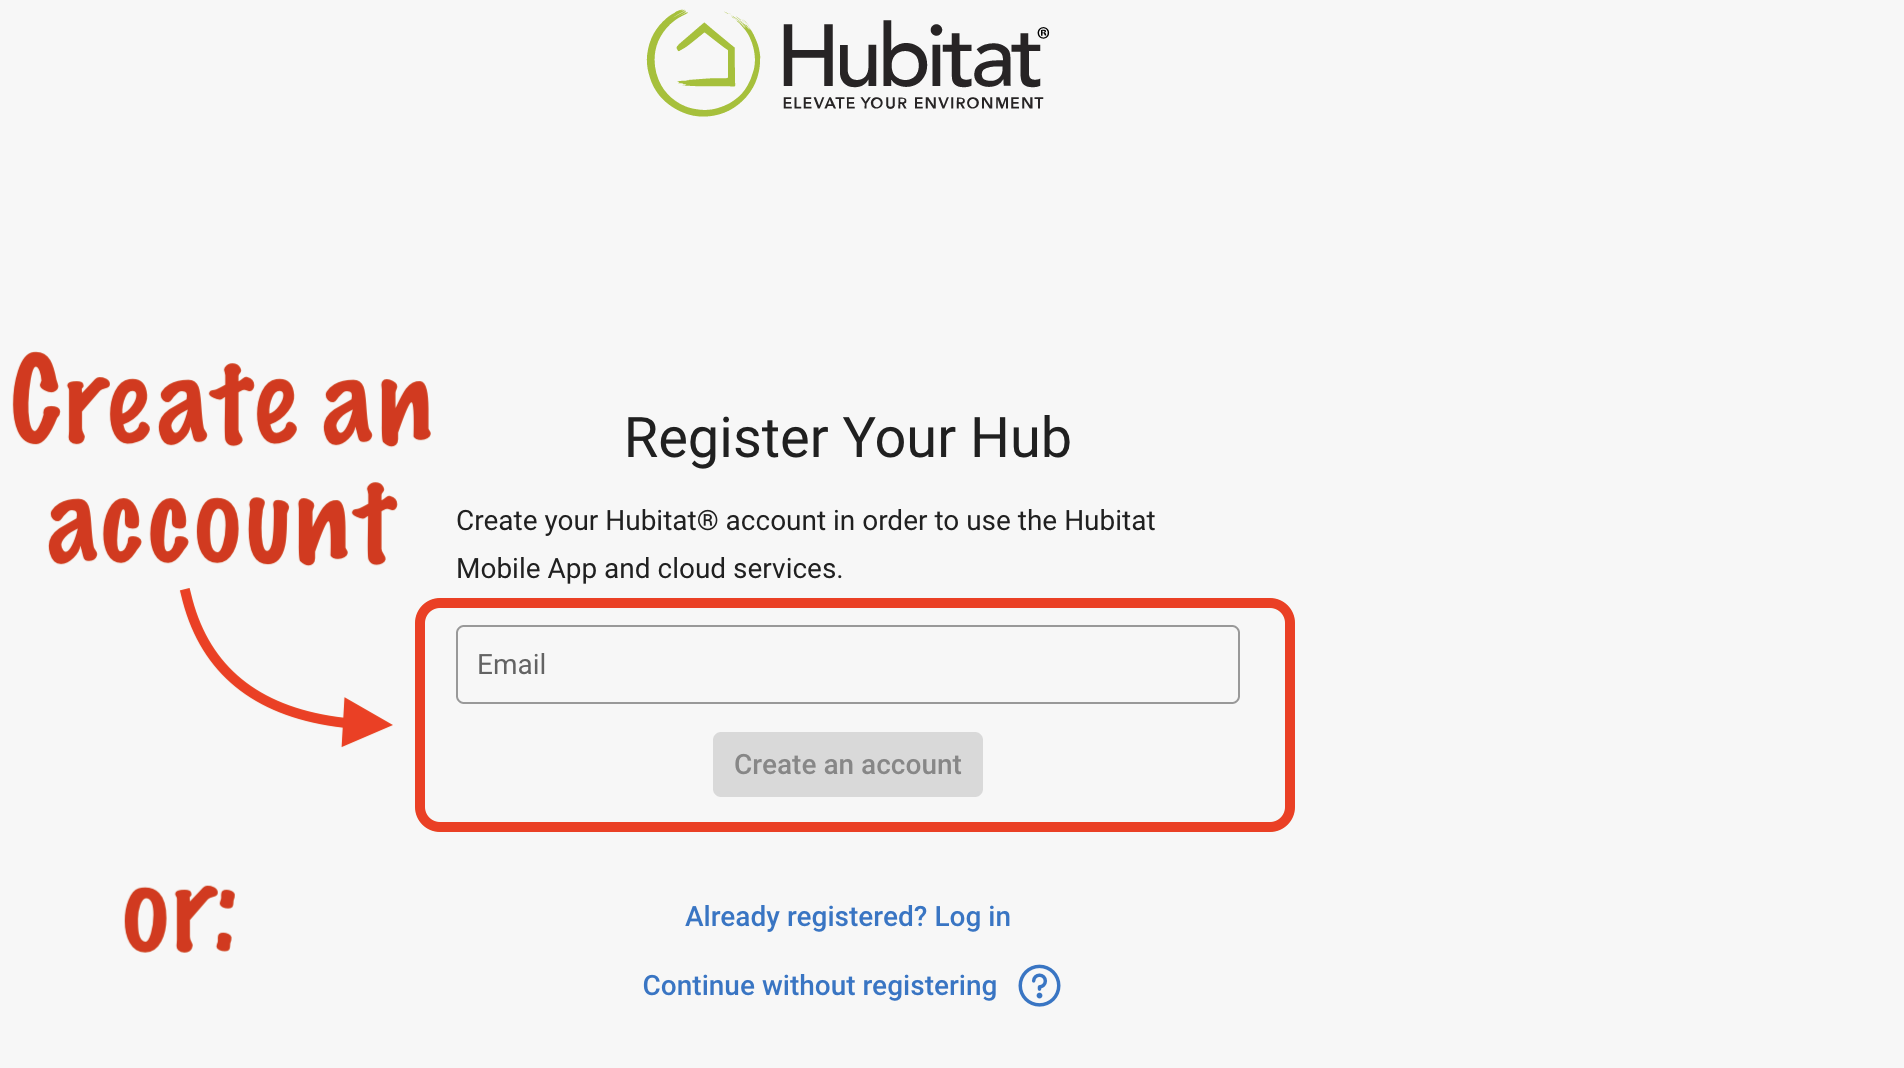
Create a Hubitat account by entering your e-mail address, selecting Create an account, and following the prompts. Creating an account will enable use of the Hubitat mobile app and other cloud features. (Note: if you do not receive the confirmation code in your e-mail, be sure to check your junk/spam folders.) Alternatively, if this not your first Hubitat hub or you have already created an account, select the link to log in instead.
-
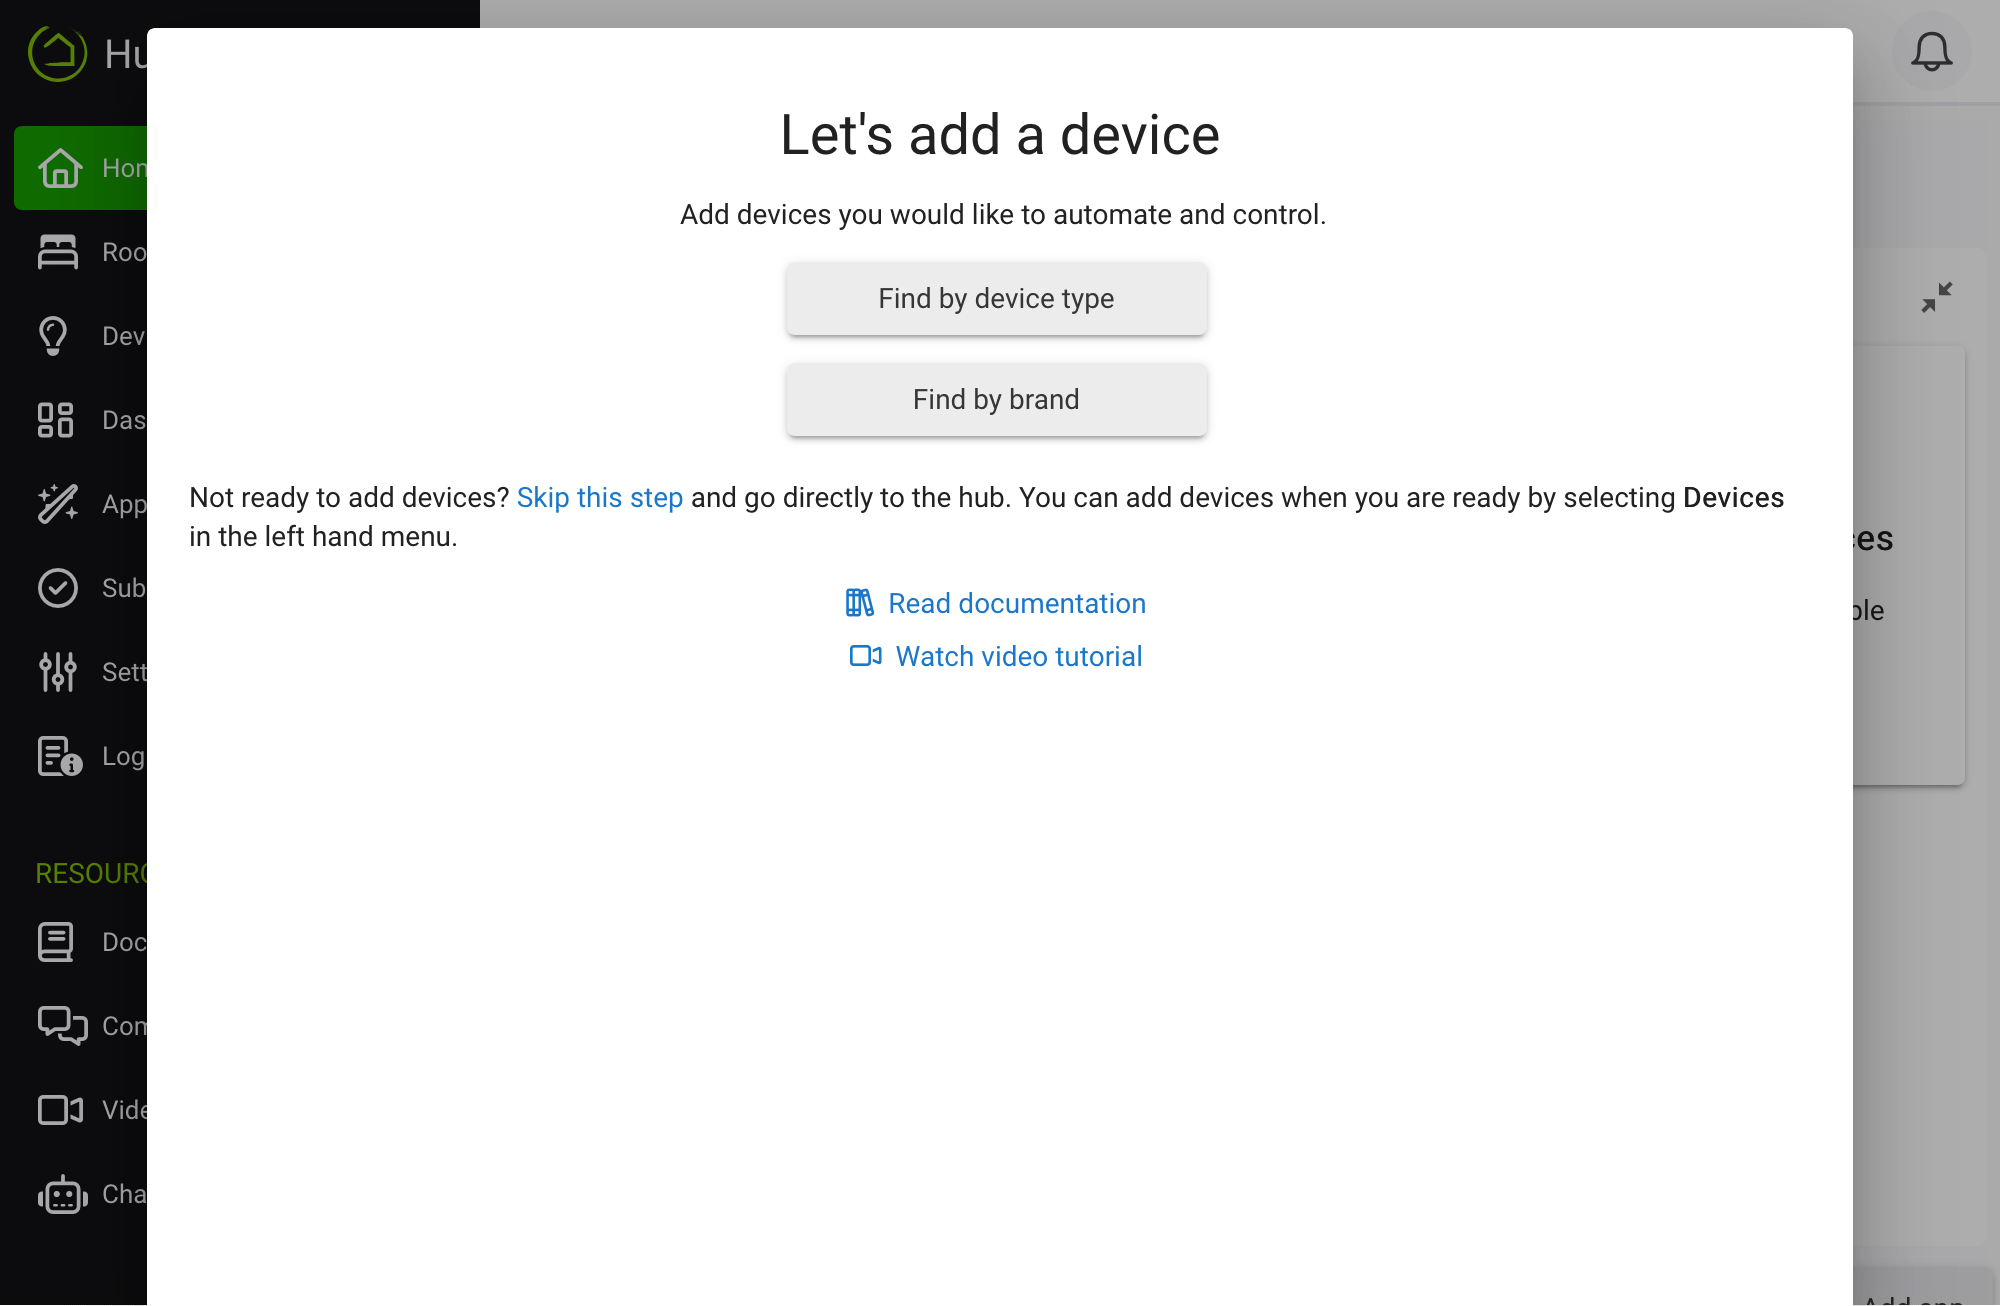
You're almost done! You should now be redirected to the hub interface with the option to add your first device. Select Find by device type or Find by brand and follow the prompts to add your first Z-Wave or Zigbee device. Alternatively, select Skip this step to go directly to the hub interface. You can add devices later under Devices in the left-side menu.
-
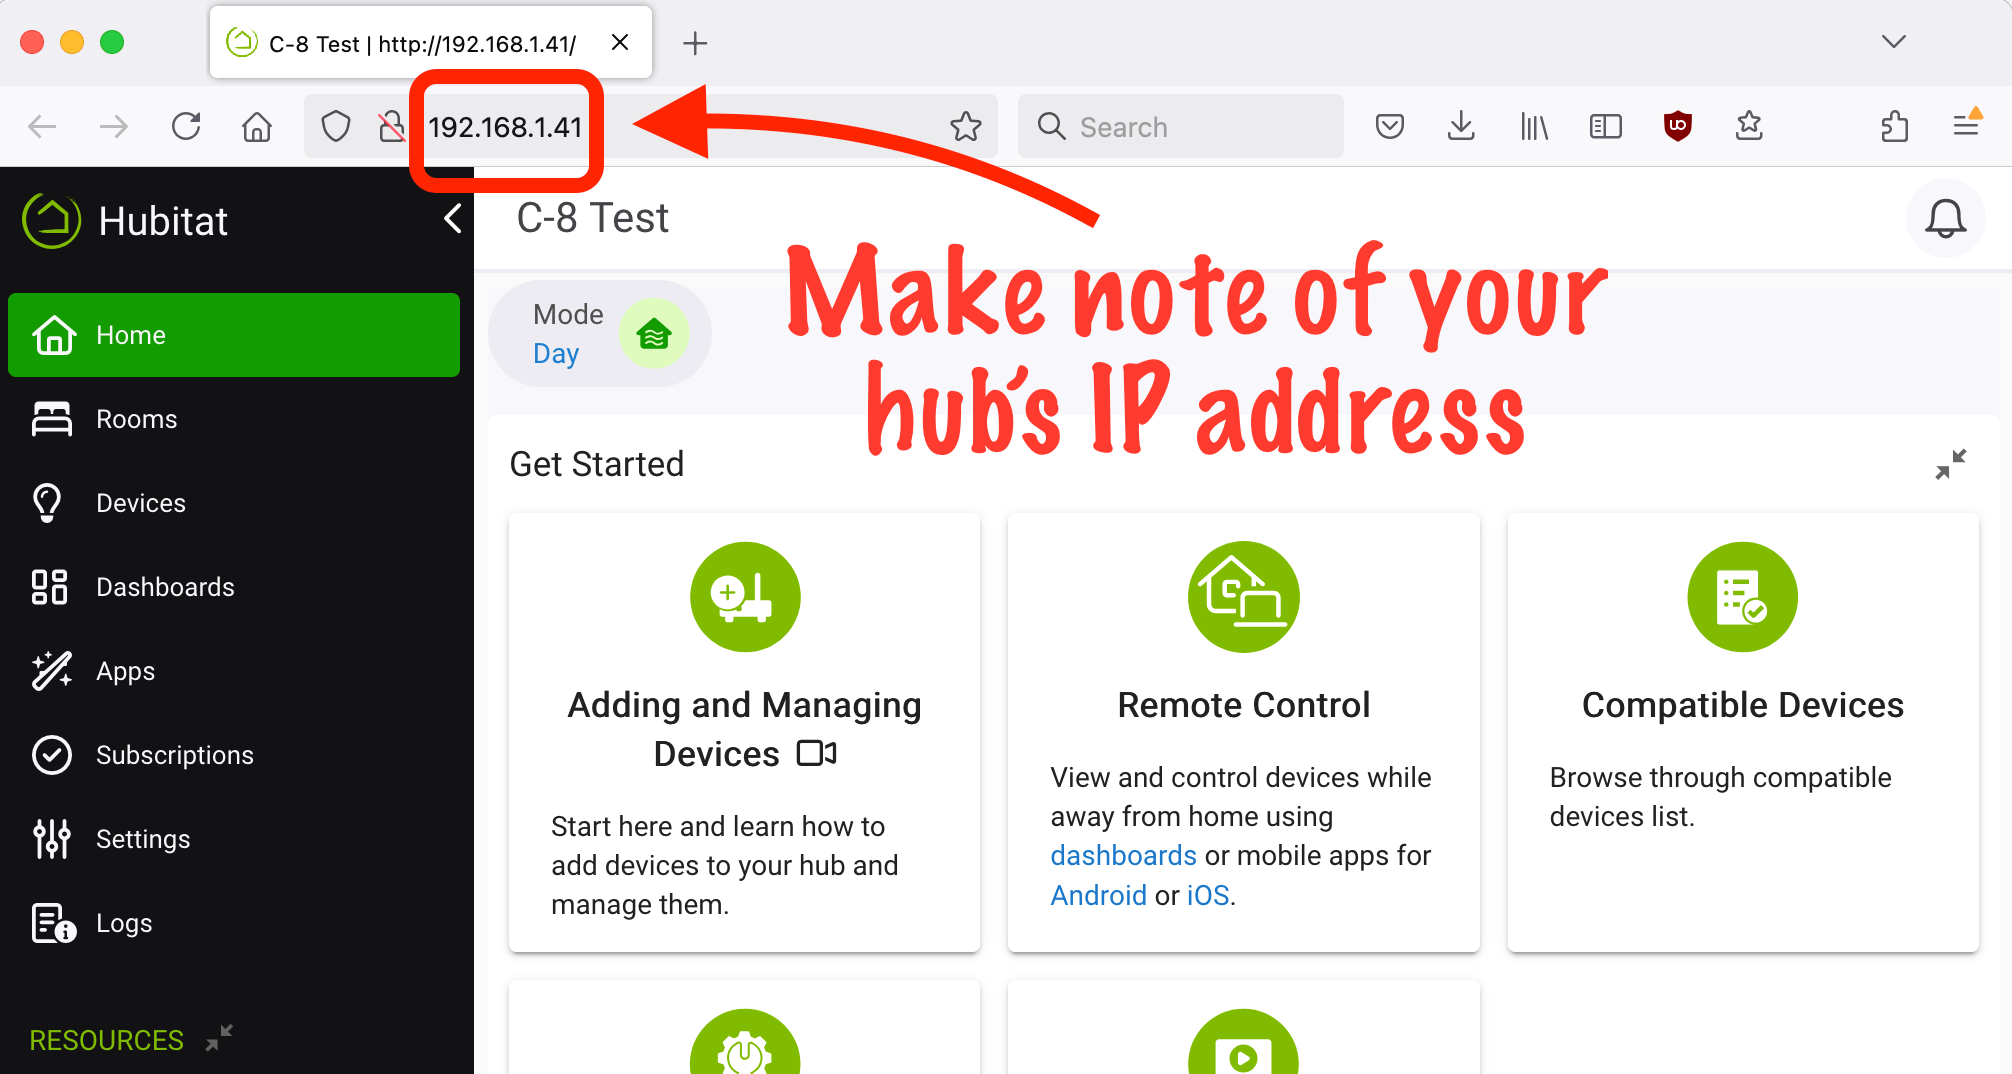
You will now be redirected to the Main Menu of your hub. Be sure to note the IP address in your browser address bar. This is a fast way to access the web interface (also called the Main Menu or admin interface) of your hub. For an even faster and more convenient connection to Hubitat Elevation, we recommend bookmarking the hub address in your web browser.
-
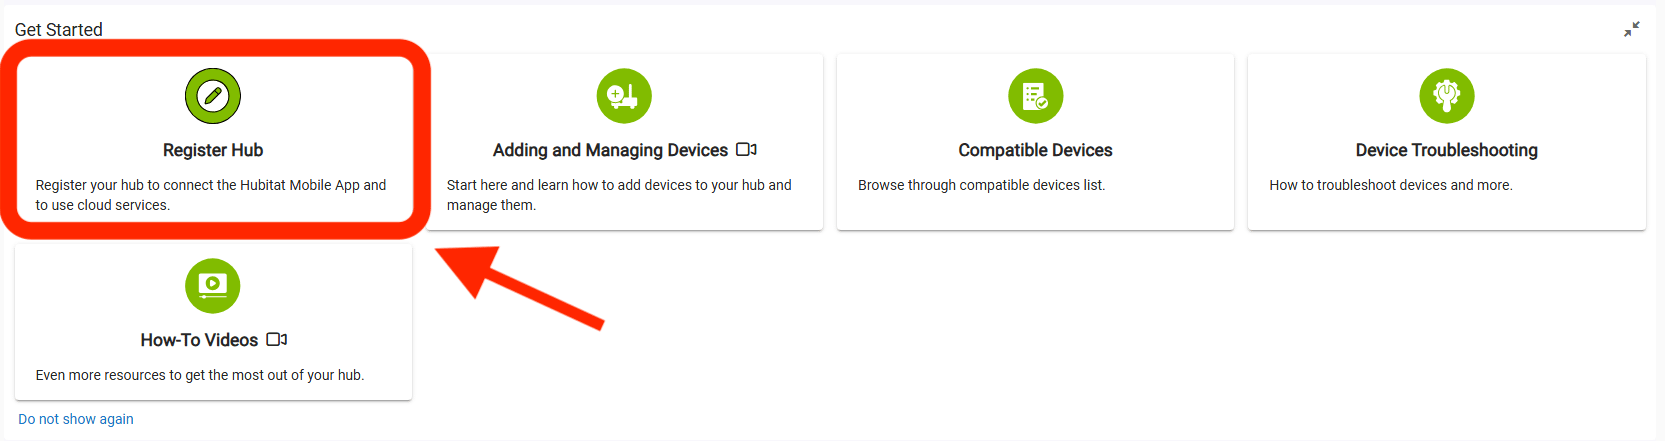
Select the Register Hub card.
-
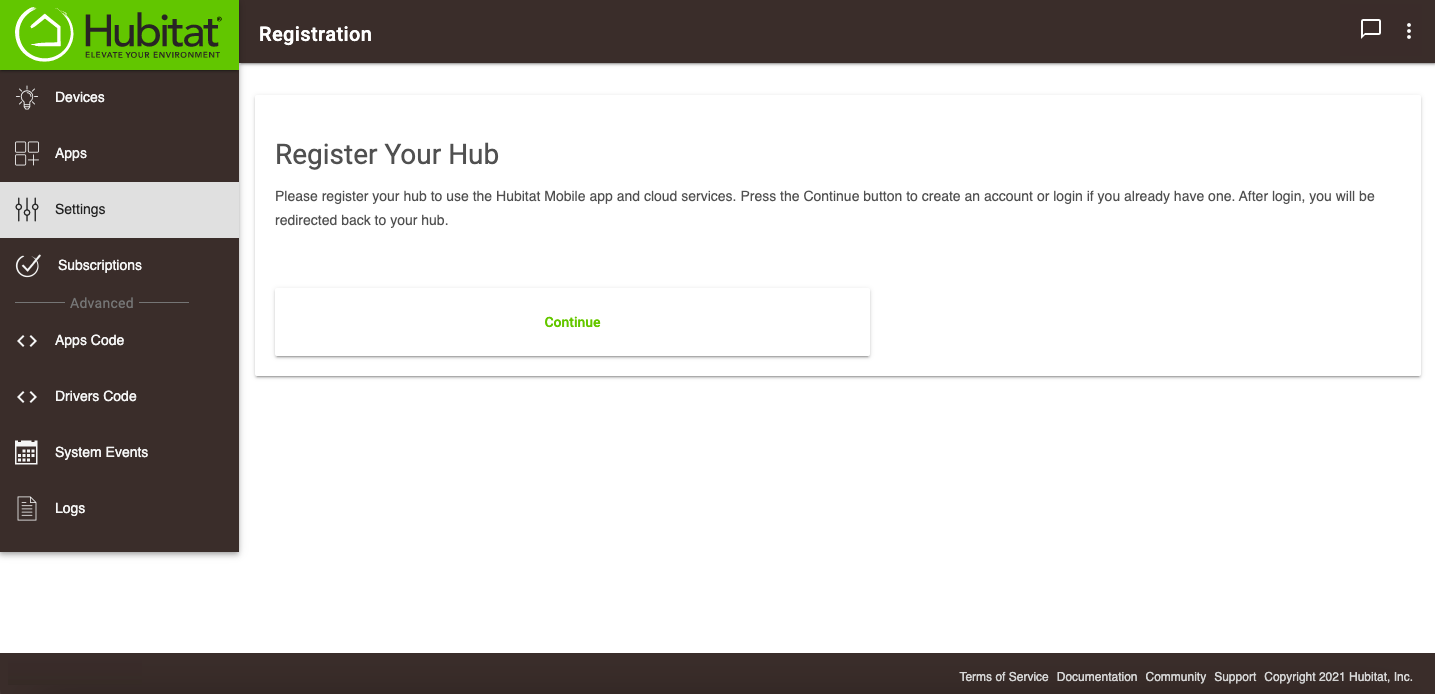
Press the Continue button to register your hub. Your hub cannot use the Hubitat mobile app and cloud services unless it is first registered.
-
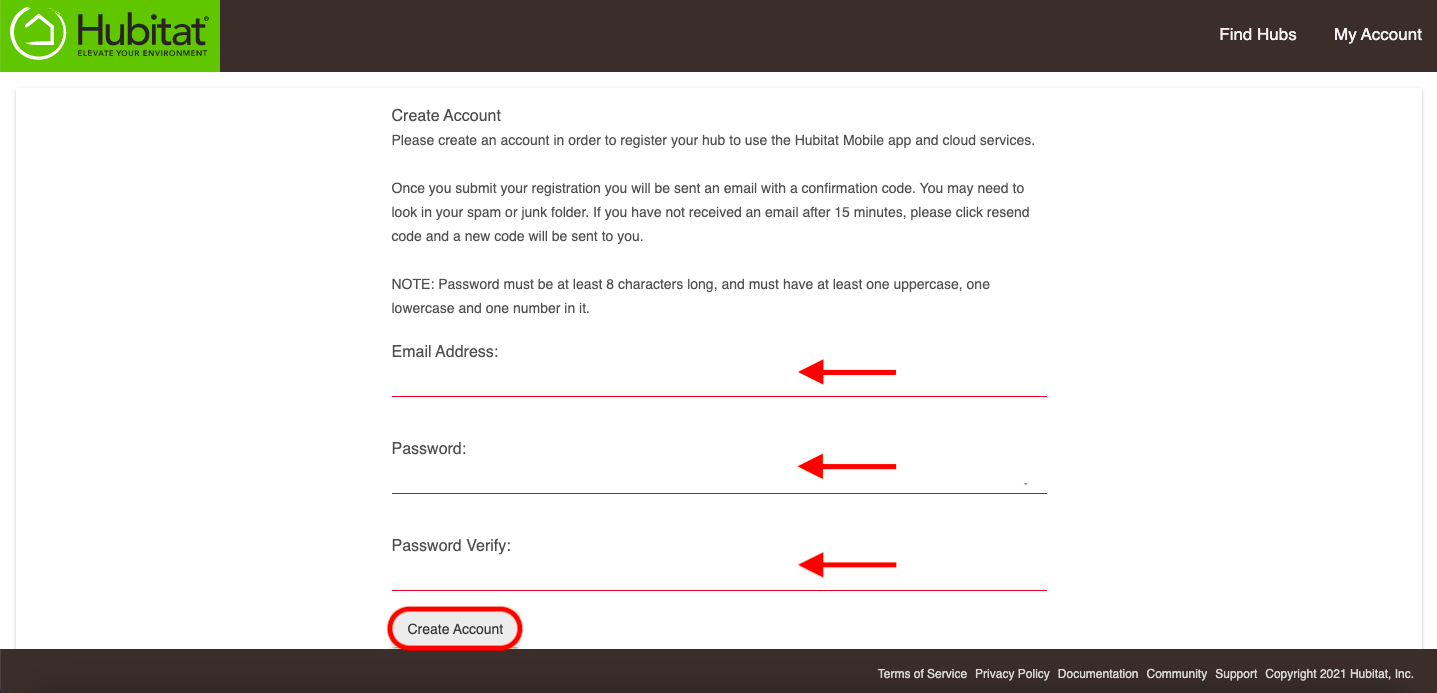
If you do not already have a My Hubitat account, enter the email address you want to use to register your hub, together with a strong password, and press the Create Account button.
How to register later
If you skipped registration during initial setup (as described above), it can also be done later:
-
Select the Register Hub card from the Main Menu of your hub:
-
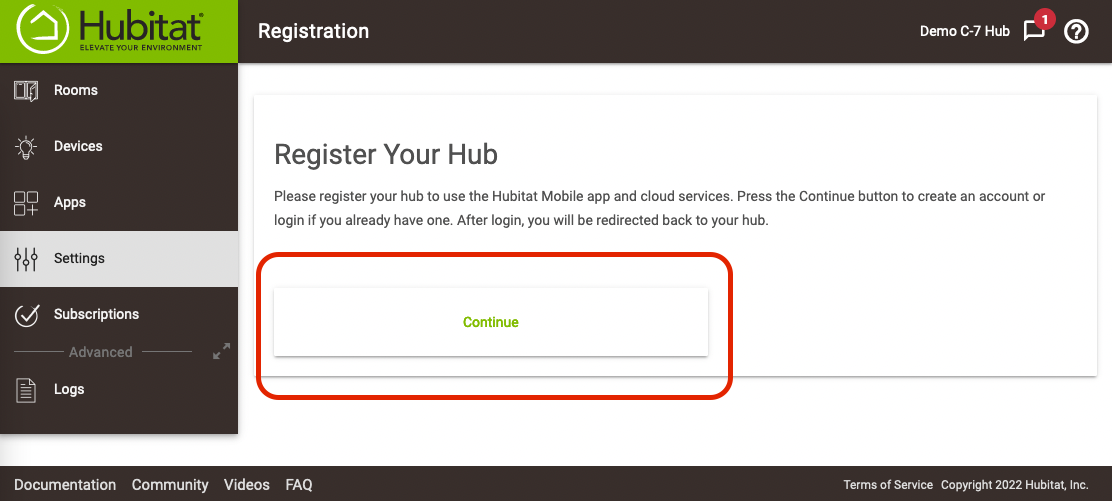
Press the "Continue" button on the Register Hub page:
-
Create an account by entering the required details when prompted (or log in if you have already created an account).
NOTE: If you have already created an account and are logged in to it after selecting the link, your hub will be automatically registered to the logged-in account and you will be redirected back to the hub Main Menu page, with no further action required. (You can confirm registration as described below.)
-
Check the email address of the account you registered for the confirmation code after the registration e-mail has been sent, as shown below:
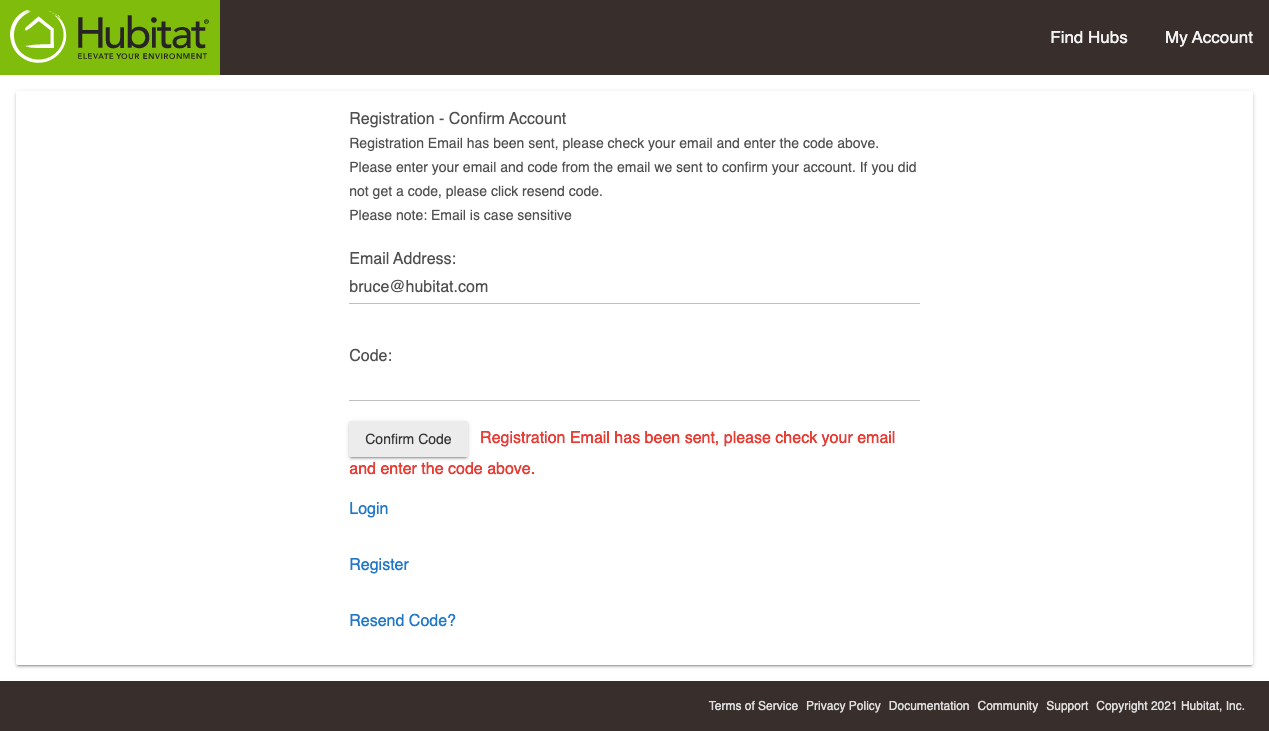
-
The email sender is accountverification@hubitat.com.

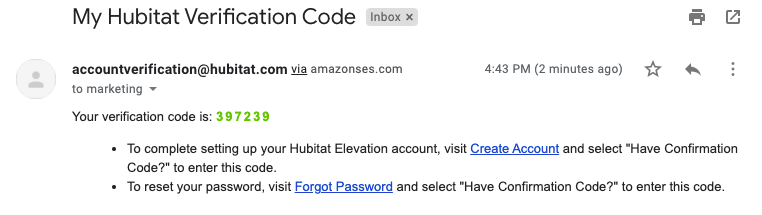
NOTE: Check your email Spam, Junk, Promotional, or other folders/filters if you cannot find the email in your inbox.
-
Enter the verification code from the email and press the Confirm Code button.
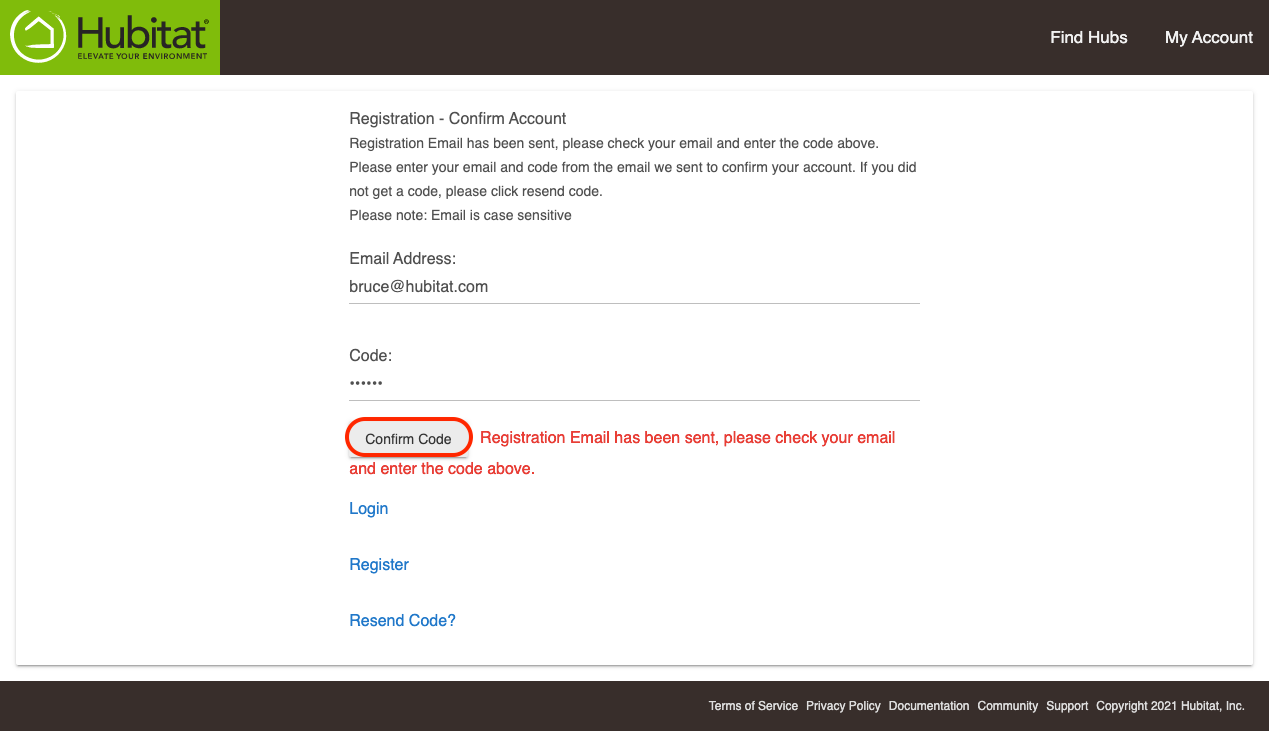
-
You will again be redirected to the Hubitat Elevation Main Menu of your hub.
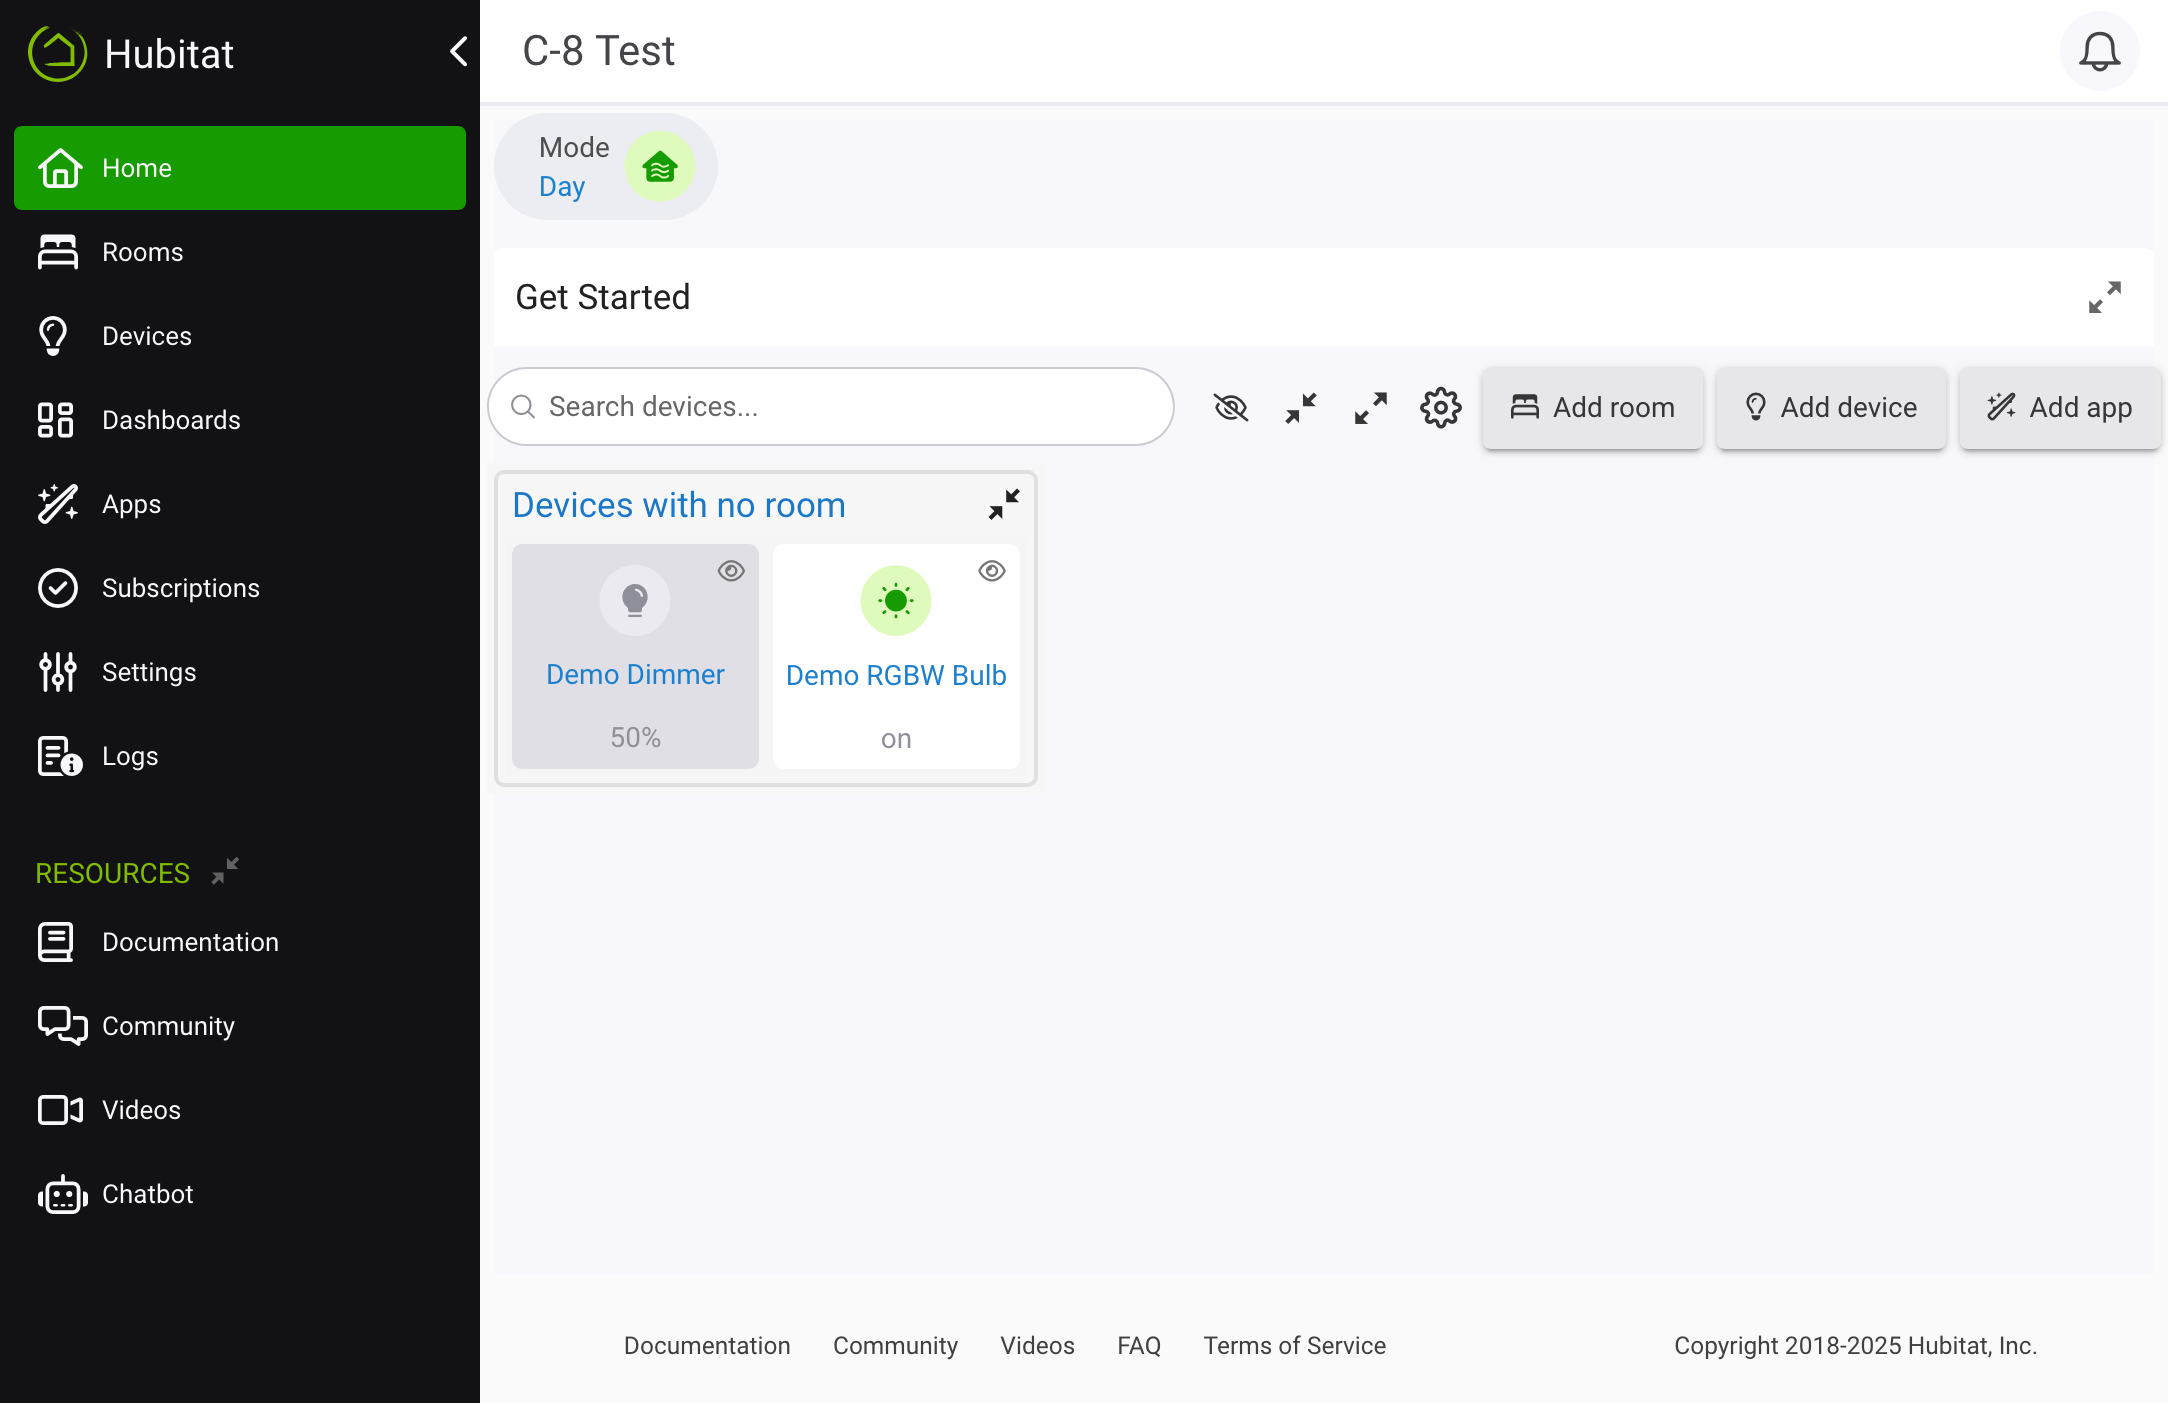
-
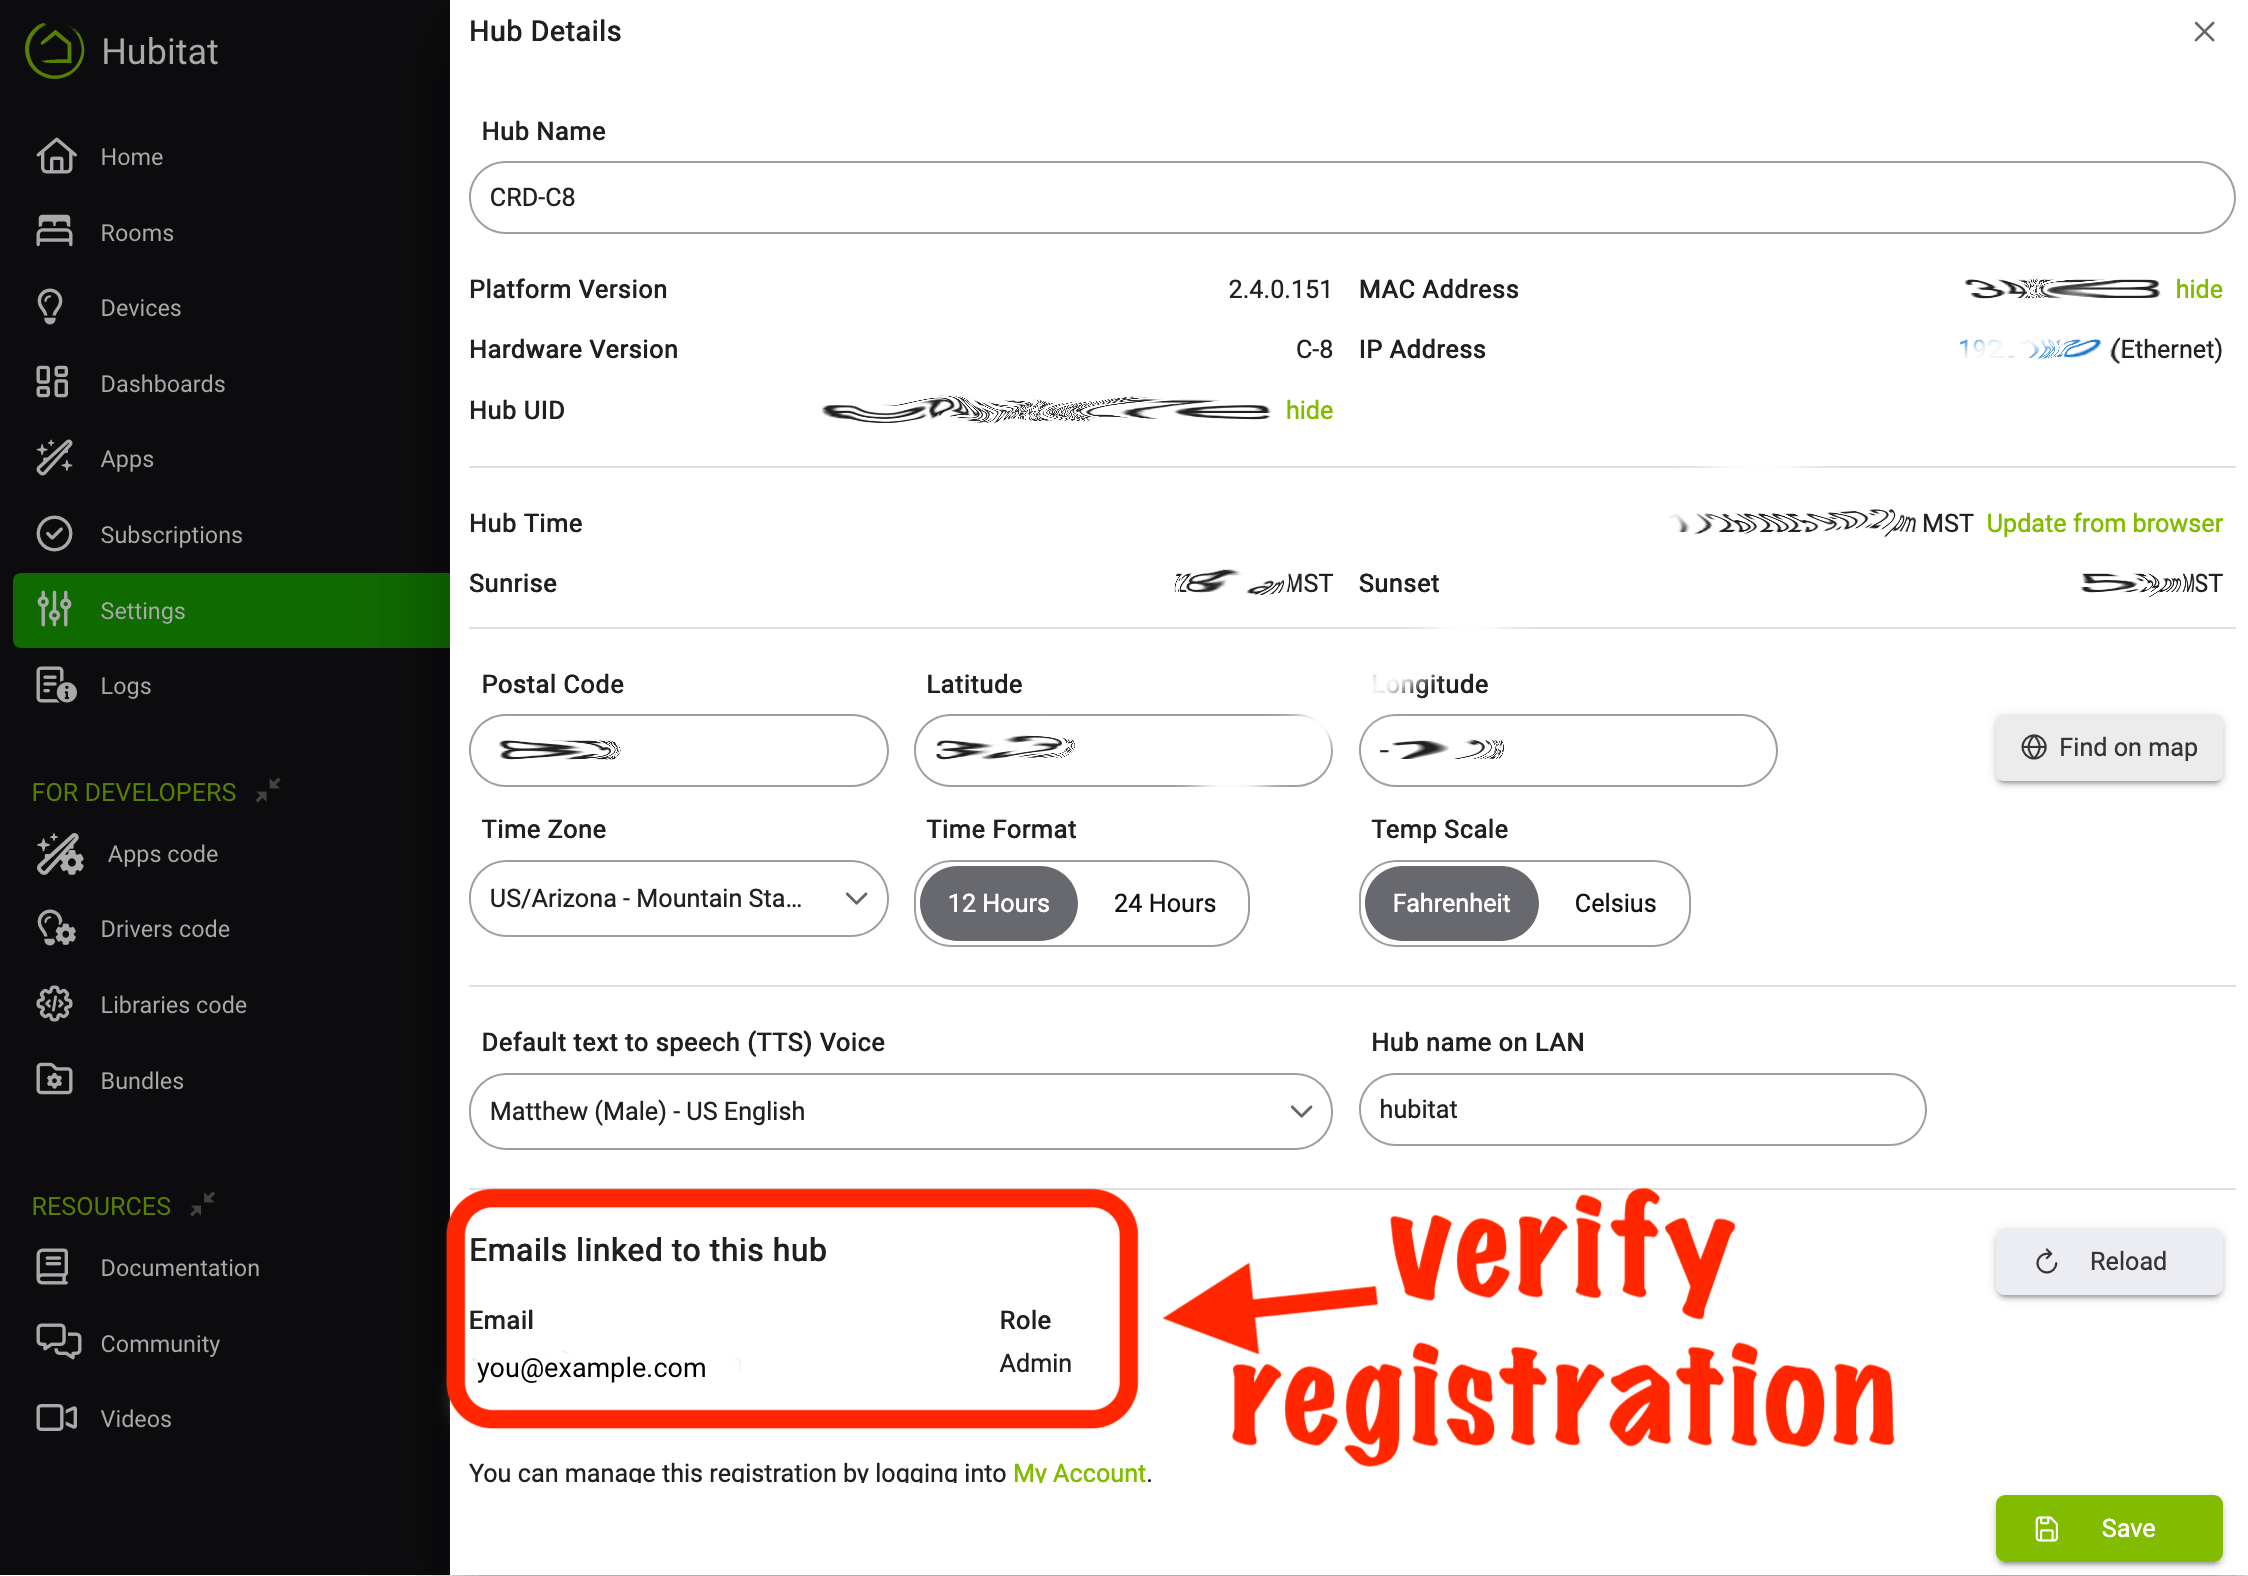
Navigate to Settings > Hub Details, scroll down to view the Emails linked to this hub section, then confirm your hub shows as registered with the correct account information.
Troubleshooting Registration
If you have trouble with the registration process:
- Try using a different device to register (we recommend using a computer for the initial setup).
- Microsoft Internet Explorer and old versions of Microsoft Edge (prior to the Chromium version) are not supported.
- Google Chrome is recommended for the best experience, with Safari or Firefox (recent versions) also working.
- If you experience issues with a supported browser, please try disabling third-party browser extensions.
- Make sure your device is connected to the the same network segment (i.e. the same IP subnet).
- Your computer or mobile device must be on the same Local Area Network (LAN) as your hub in order to register. If your hub does not appear, ensure you have your hub and computer or mobile device connected to the same router and network.
- If using a smartphone, make sure the phone is connected to your home Wi-Fi network and not using only cellular data.
- Make certain your devices are not isolated by a WiFi guest account.
- Reboot your ISP modem/router or your stand-alone router.
- If your hub still doesn't appear, select Advanced Discovery to find hubs via mDNS, MAC address or LAN scan.
- Safely shut down from Settings > Shut Down or from the Hubitat Diagnostic Tool. After the light on the front of the hub turns red, power cycle your hub by unplugging it from AC power at the adapter for 30 seconds before plugging it in again.