Hub Protect and Cloud Backup
Hub Protect and Cloud Backup are optional subscription services that offer cloud backup and hub migration and, with Hub Protect only, an extended warranty for the duration of your subscription.
Hub Protect and Cloud Backup
Hub Protect is an optional service offering cloud backup and ongoing warranty for the subscribed hub(s).
Cloud Backup is an optional service offering cloud backup for the subscribed hub(s).
A single subscription to either service is valid for only one hub. You may subscribe to one or both (or none). If you have multiple hubs, you may purchase multiple subscriptions. A comparison of these subscriptions for a single hub is presented below:
| Service | Number of Cloud Backups | Extended Warranty? |
|---|---|---|
| Cloud Backup | 10 | No |
| Hub Protect | 5 | Yes |
| Hub Protect and Cloud Backup | 15 | Yes |
How It Works
Both Hub Protect and Cloud Backup services allow the storage of secure cloud backups for each subscribed hub. Hub Protect offers the additional benefit of extended warranty for the duration of your subscription. These backups include apps/rules, settings, and devices. You can also migrate to a new hub, saving hours of time rebuilding apps/rules and re-adding devices. These backups — in contrast to local backups – include Z-Wave, Zigbee, and File Manager (subject to 100 MB limit). Model C-7 and newer hubs support full migration to model C-8 and C-8 Pro hubs; other models may vary in supported migration paths to or from, as described in the Supported Migration Paths section.
Schedule Backups
You can set your own schedule for automatic backups or back up your hub manually at any time.
Extended Warranty with Hub Protect
Hubs purchased directly from Hubitat come with a 90-day standard warranty. A Hub Protect subscription, in addition to the offering cloud backups, extends this warranty for the duration of your subscription, subject to our Terms of Service. Should your hub fail due to a hardware defect during your subscription period, Hubitat will send you a replacement hub. Besides the number of cloud backups allowed, the Hub Protect and Cloud Backup subscription benefits differ in that only Hub Protect offers this extended warranty.
How to sign up for Hub Protect or Cloud Backup
-
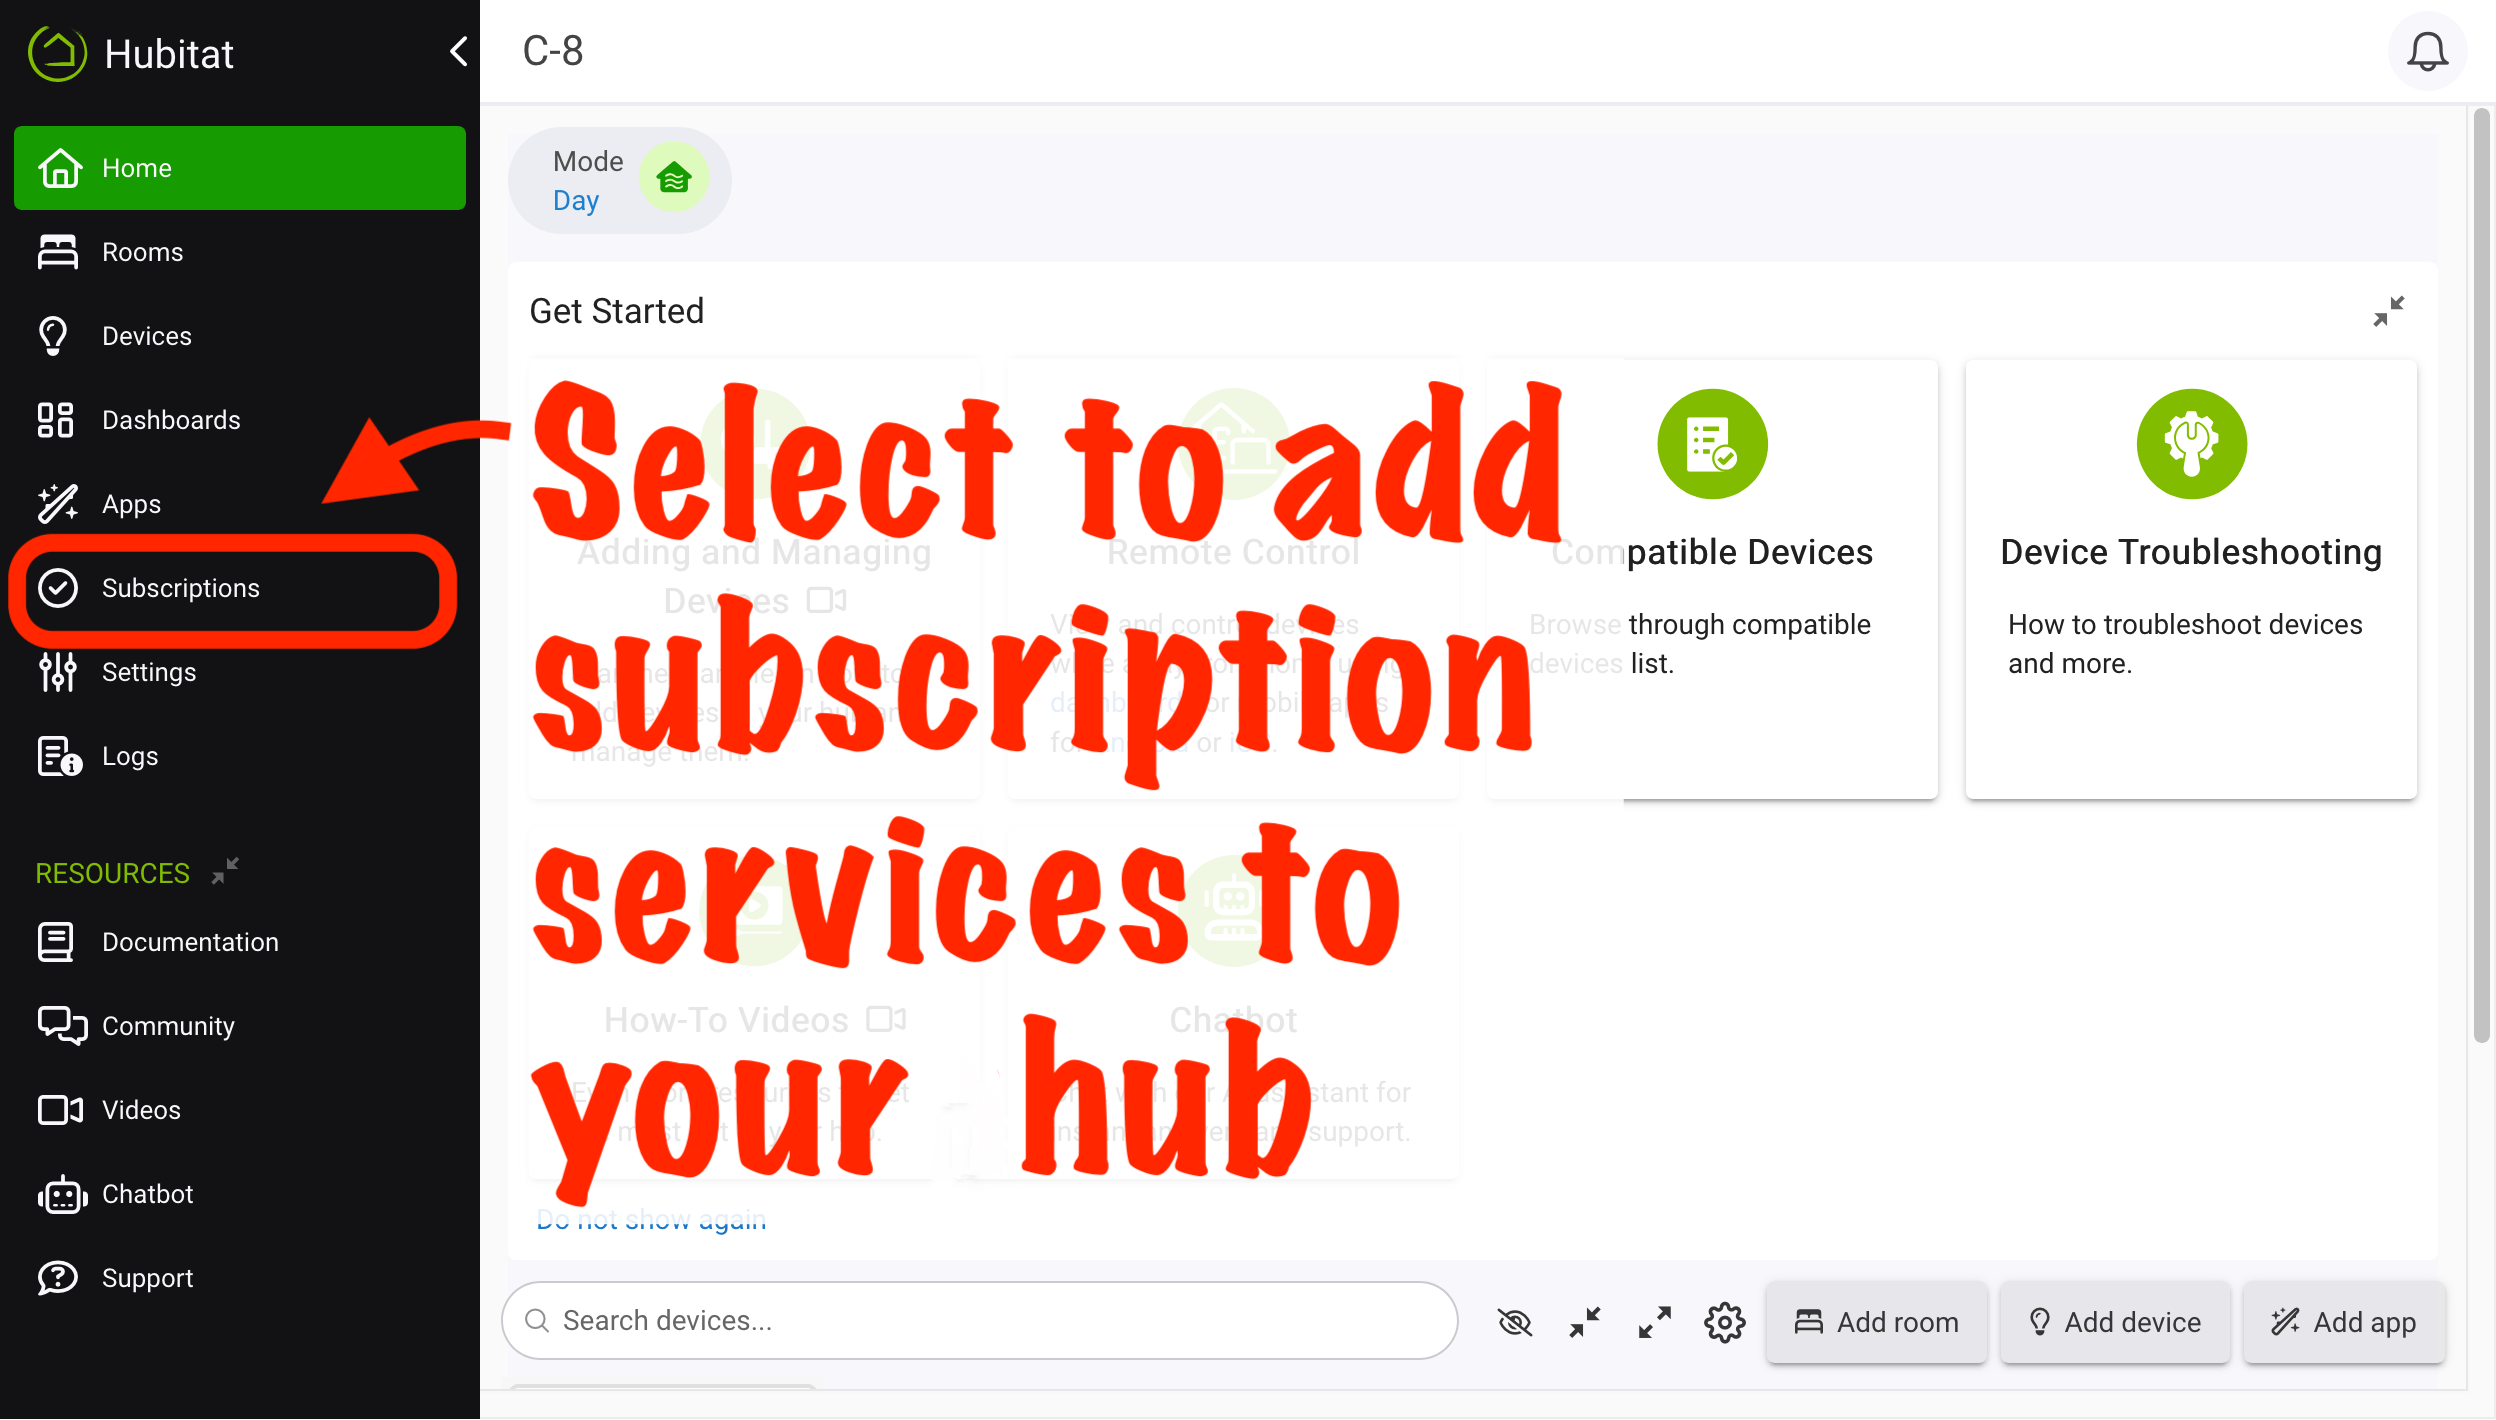
From your hub, select Subscriptions in the sidebar.
-
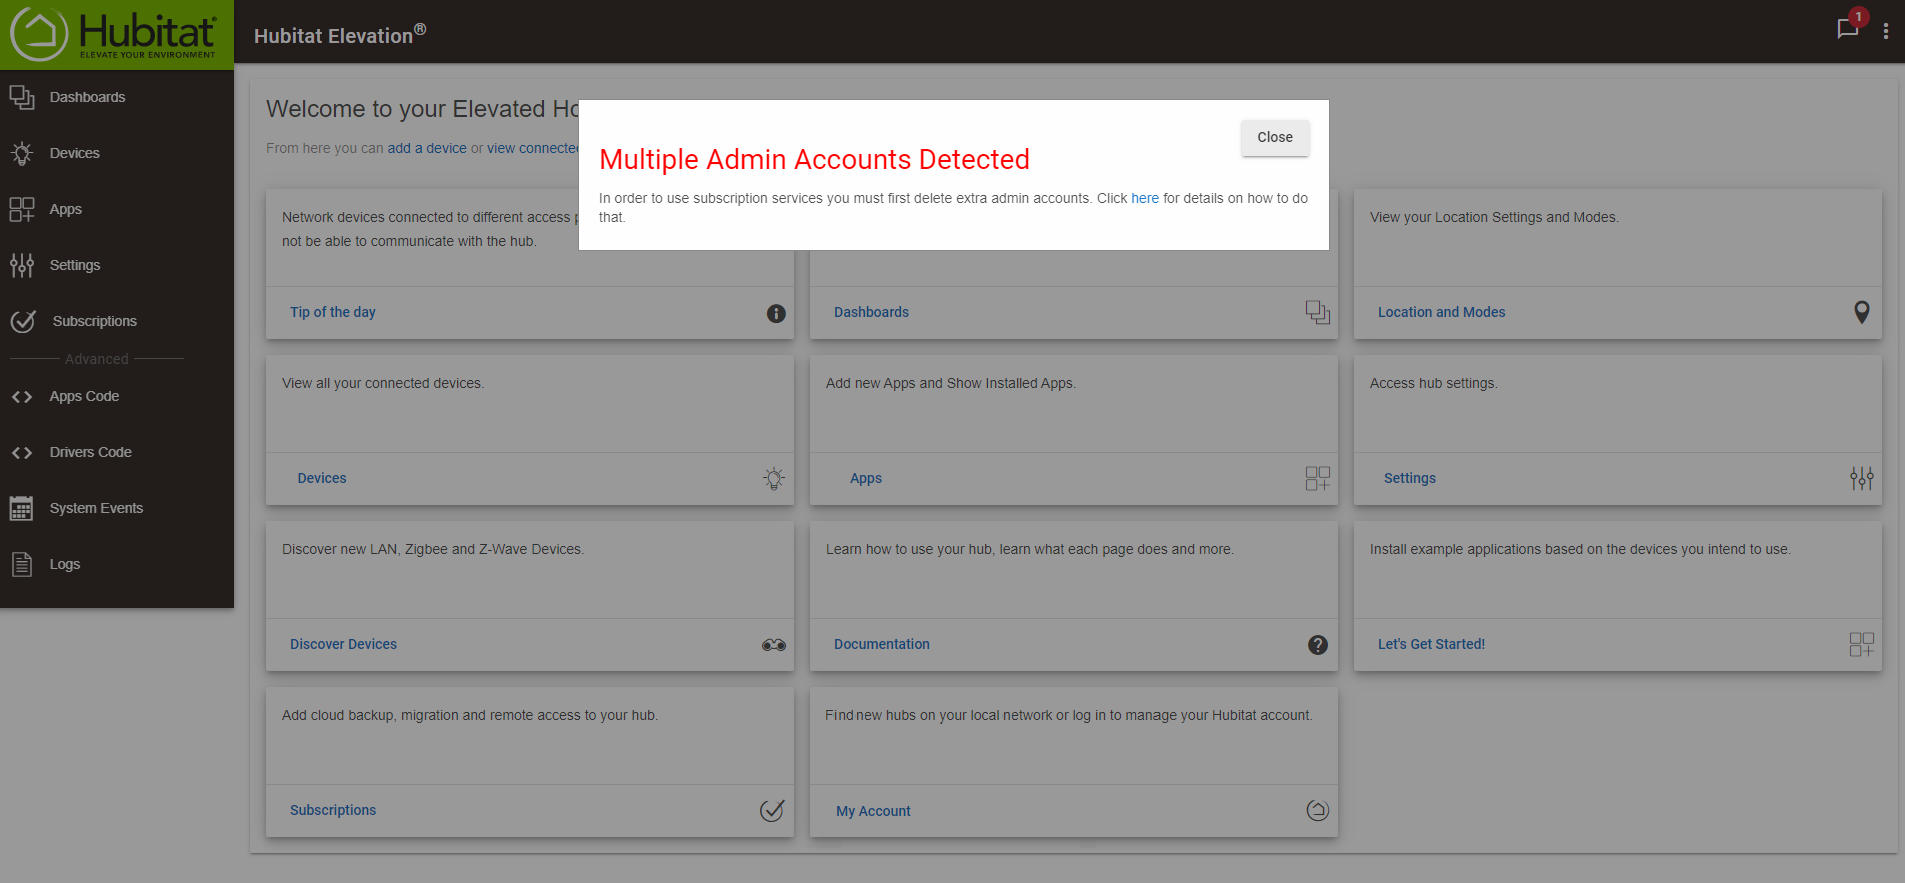
If you receive a warning message that you have multiple administrator accounts, please see How to correct a Multi-Admin error to correct the issue before proceeding.
-
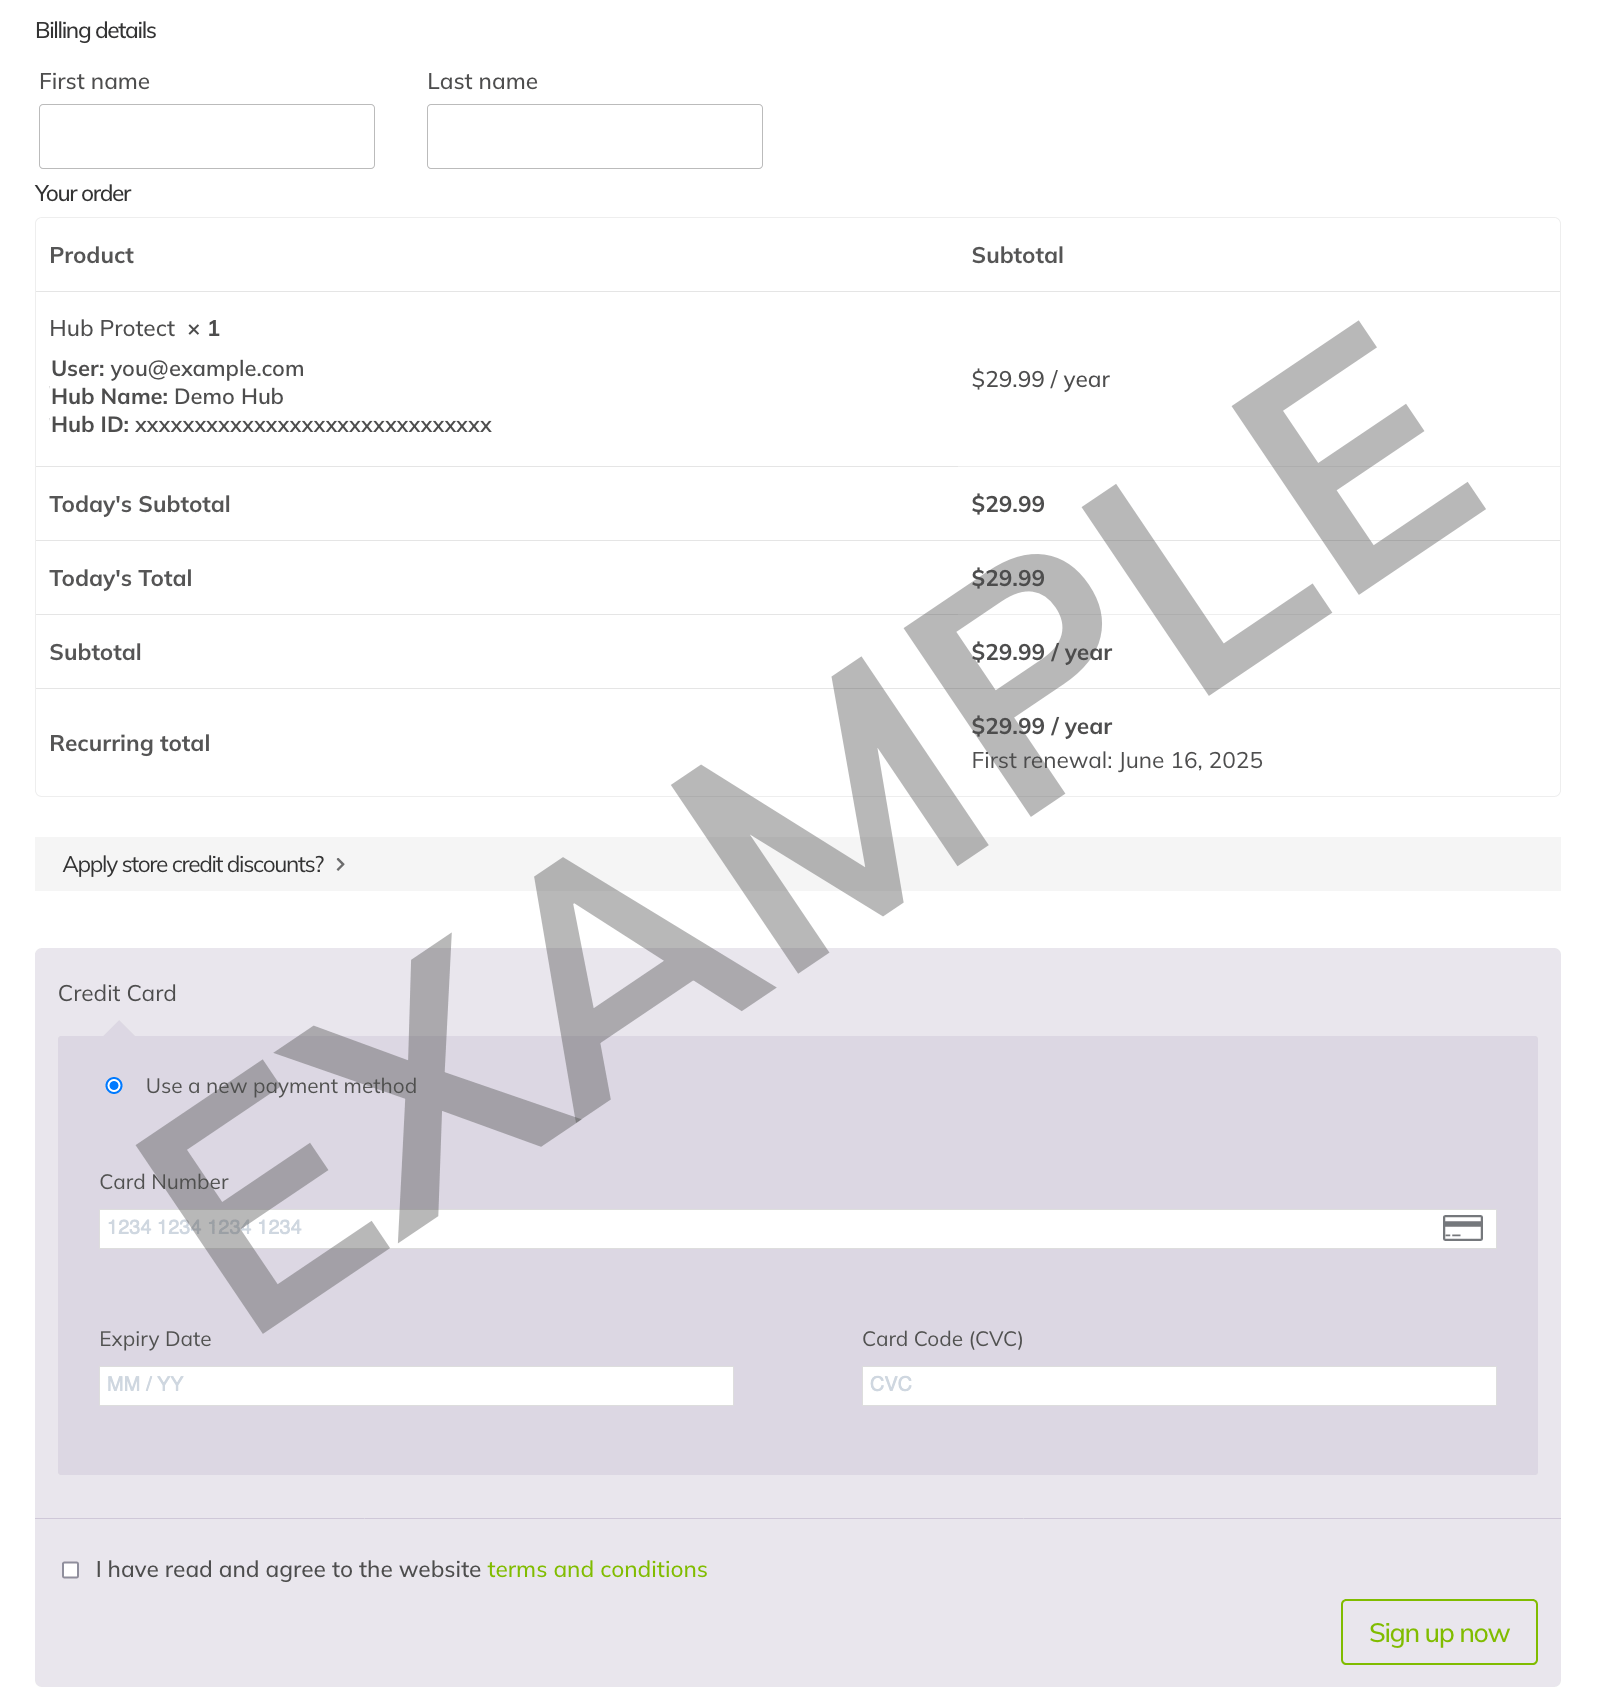
Ensure you are logged into the Hubitat account you want add Hub Protect to and select Subscribe Now. These steps continue showing a Hub Protect subscription; however, for Cloud Backup, simply select that service instead (or any of the bundled service options you prefer instead). NOTE: Prices (and other information) shown in the screenshot below may not reflect the current price for all users; consult the actual website and this documentation for current information.
-
Enter a first and last name, along with credit card information.
-
After you have read the terms and conditions, select the check box to agree.

-
Once again, select Sign up now.

-
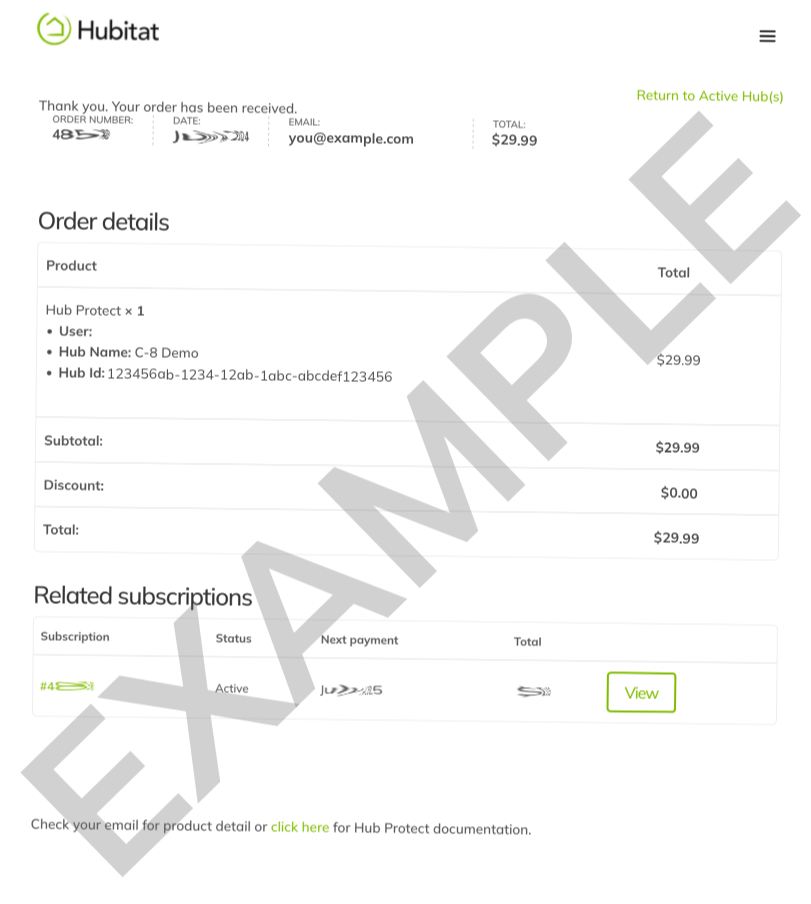
You will see an order confirmation of your purchase and a copy of this order will be sent to the email account submitted with your subscription.
-
Select Registered Hubs from the top menu of your order confirmation page (use the menu icon in the top right first if you do not see these links) to verify your hub is now protected or to sign up any additional hubs for the service.

-
Confirm your hub now shows Protected
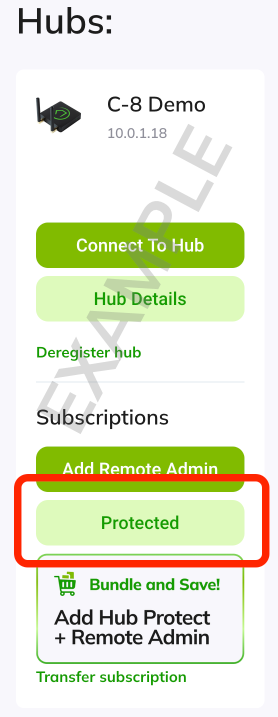
-
Sign up any additional hubs by selecting Add Hub Protect and repeating these steps for any additional hubs you wish to subscribe.
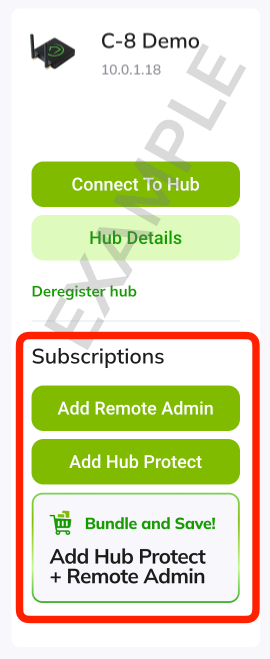
Back Up
With your hub now subscribed, you may set the time for when database maintenance and backup to the cloud will occur.
- Set the desired time for the database maintenance and backup and the frequency of automatic cloud backups:
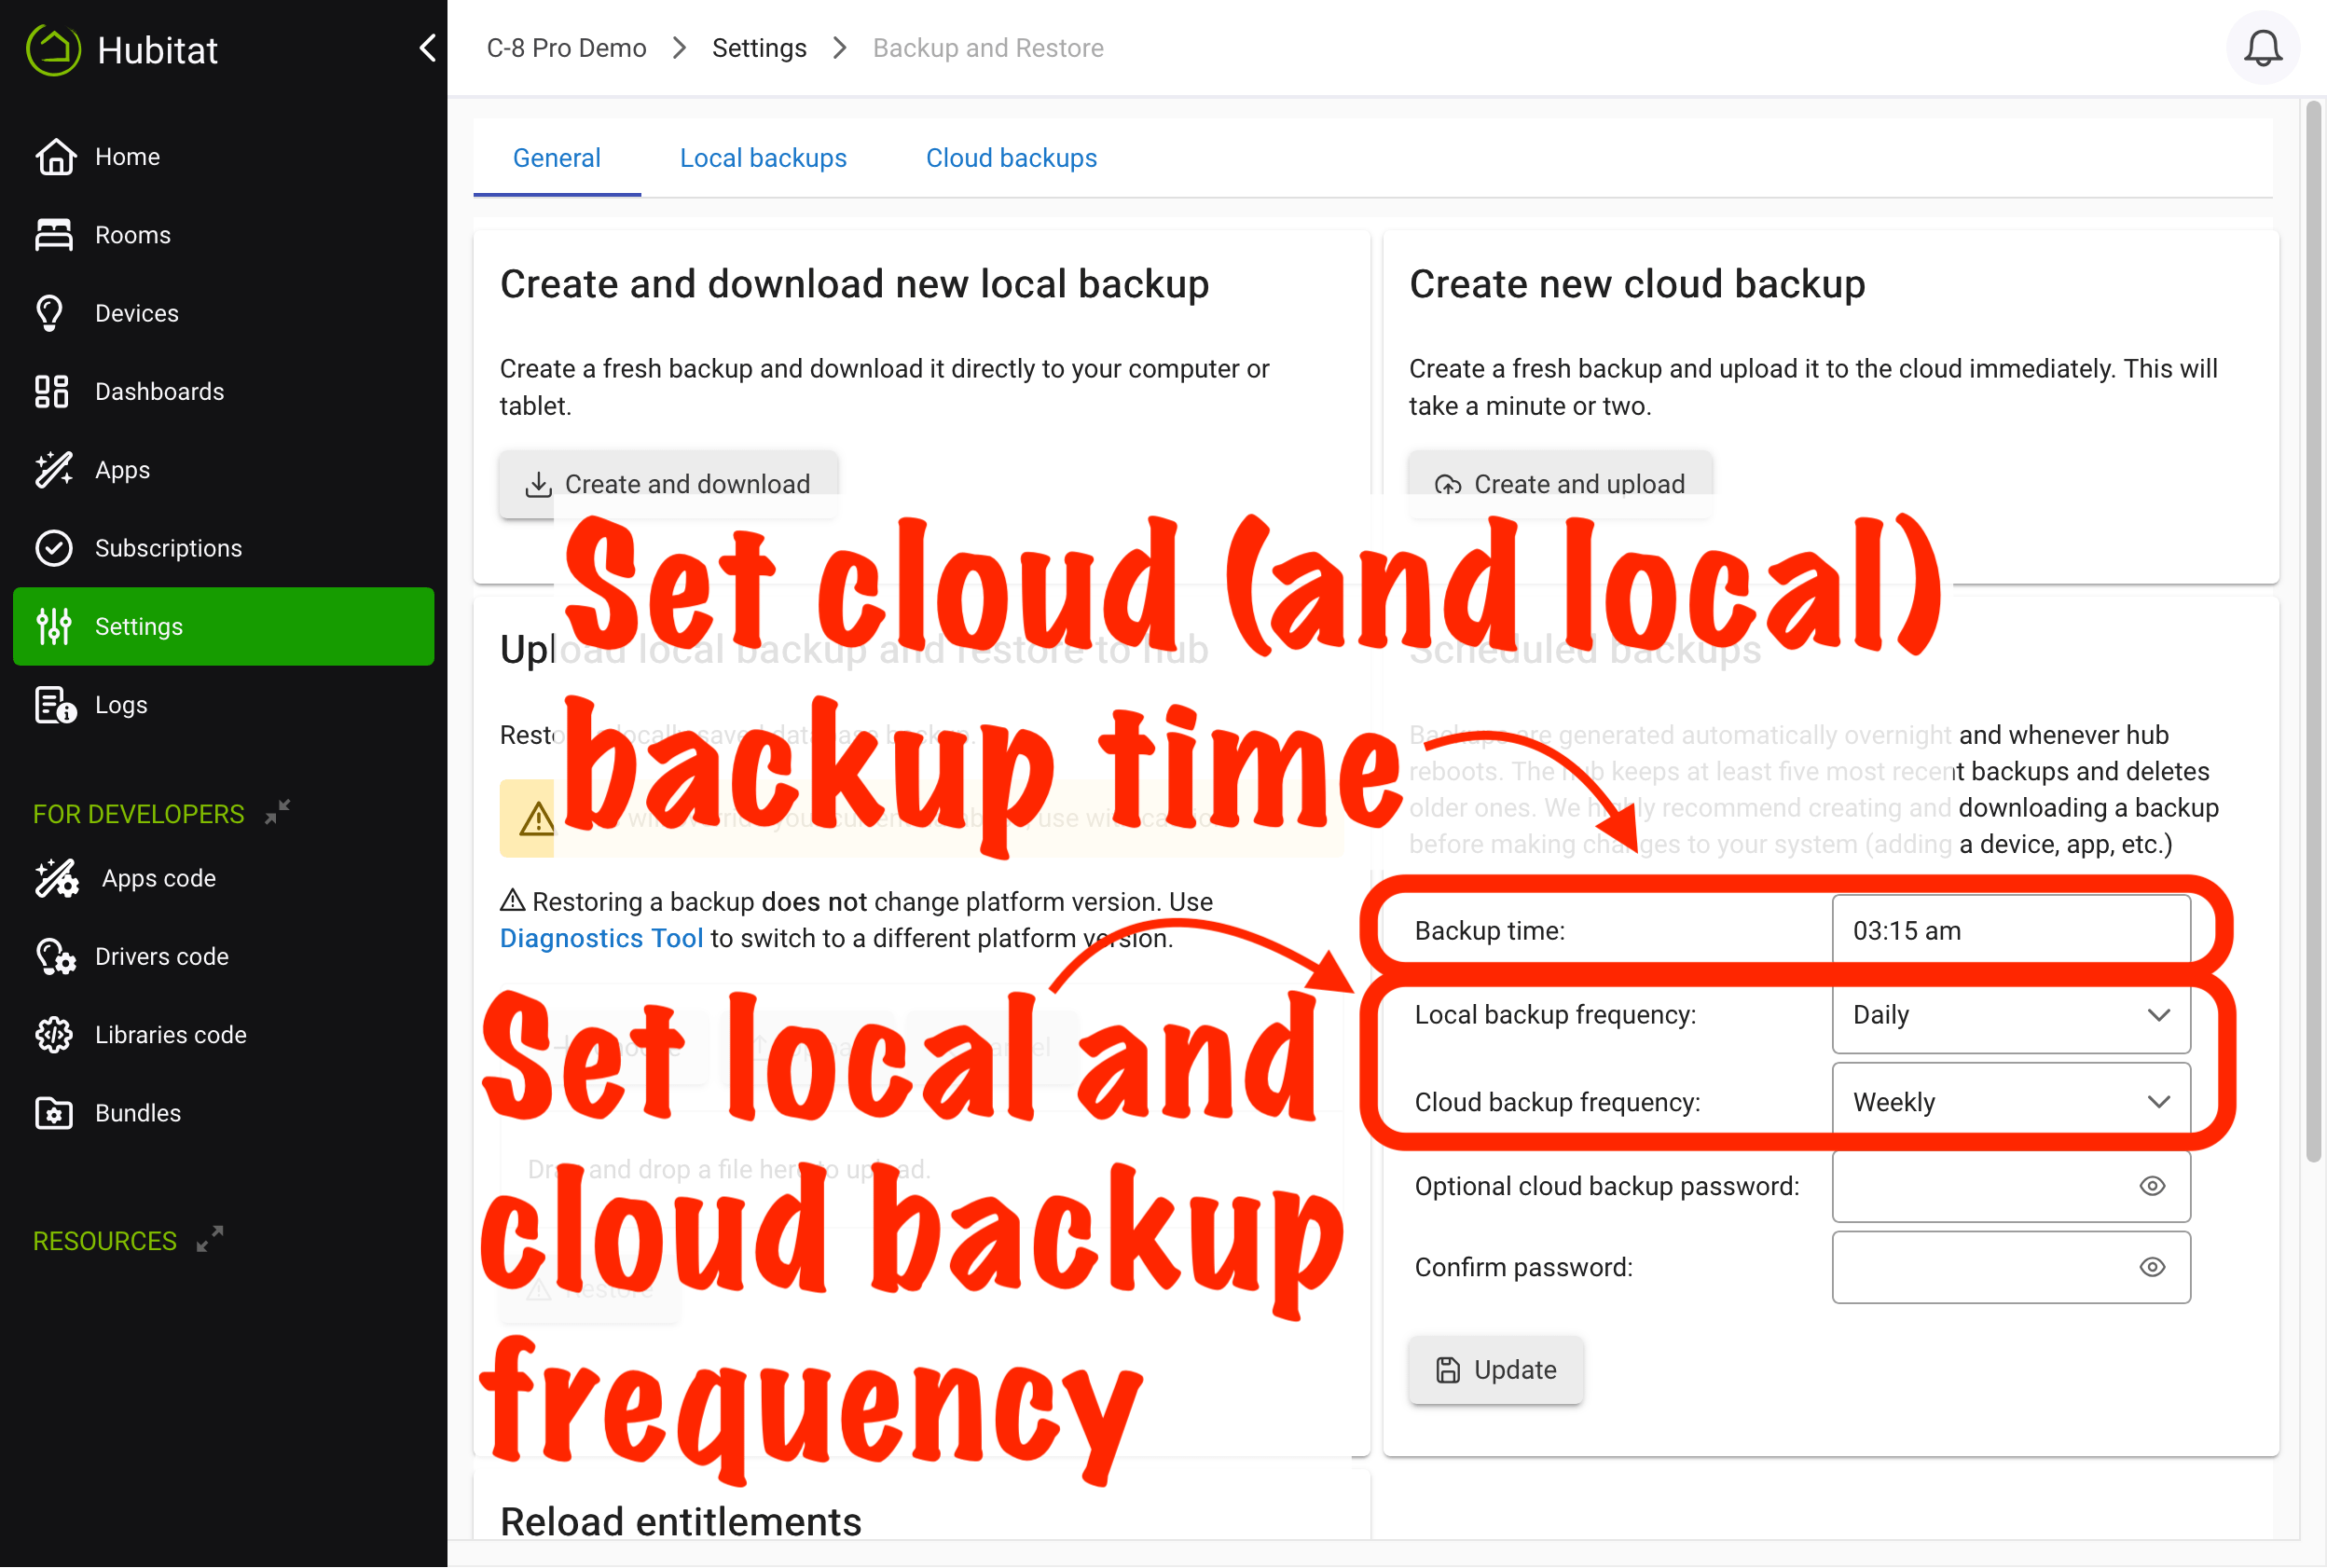
- Optionally, you may set a password for this backup, which must be provided if/when you restore the backup later.
- Backups will now be made automatically according to your selected schedule. You may also select Back up now to upload a cloud backup on demand.
Migrate
When migrating a backup, your existing settings, devices, apps and device code, etc. on the new hub will be replaced by the migrated backup data. You may also choose to include Z-Wave and Zigbee devices from the old hub (select models only; see below), without the need to manually re-add each device on the new hub. This can save you hours of time rebuilding rules and going through the lengthy process of excluding and including these devices.
-
Save a new cloud backup:
- Make sure your existing hub is online, registered, and able to reach the Internet (for the Hubitat cloud service).
- If you have turned on "Enable lockCode encryption" in the lock driver settings, you should turn it off prior to saving the backup for migration to the new hub. You can turn on Enable lockCode encryption again on the new hub after migration if so desired.
- If you are migrating from a model C-5 hub and plan to migrate Z-Wave, you should perform a Z-Wave Repair before uploading the cloud backup that will be used to migrate.
- Select Create and upload under the Create a new cloud backup on the General tab to upload a new backup (or if your hub is no longer functional and you are no longer able to perform these steps, use the latest available Hub Protect cloud backup when restoring instead):
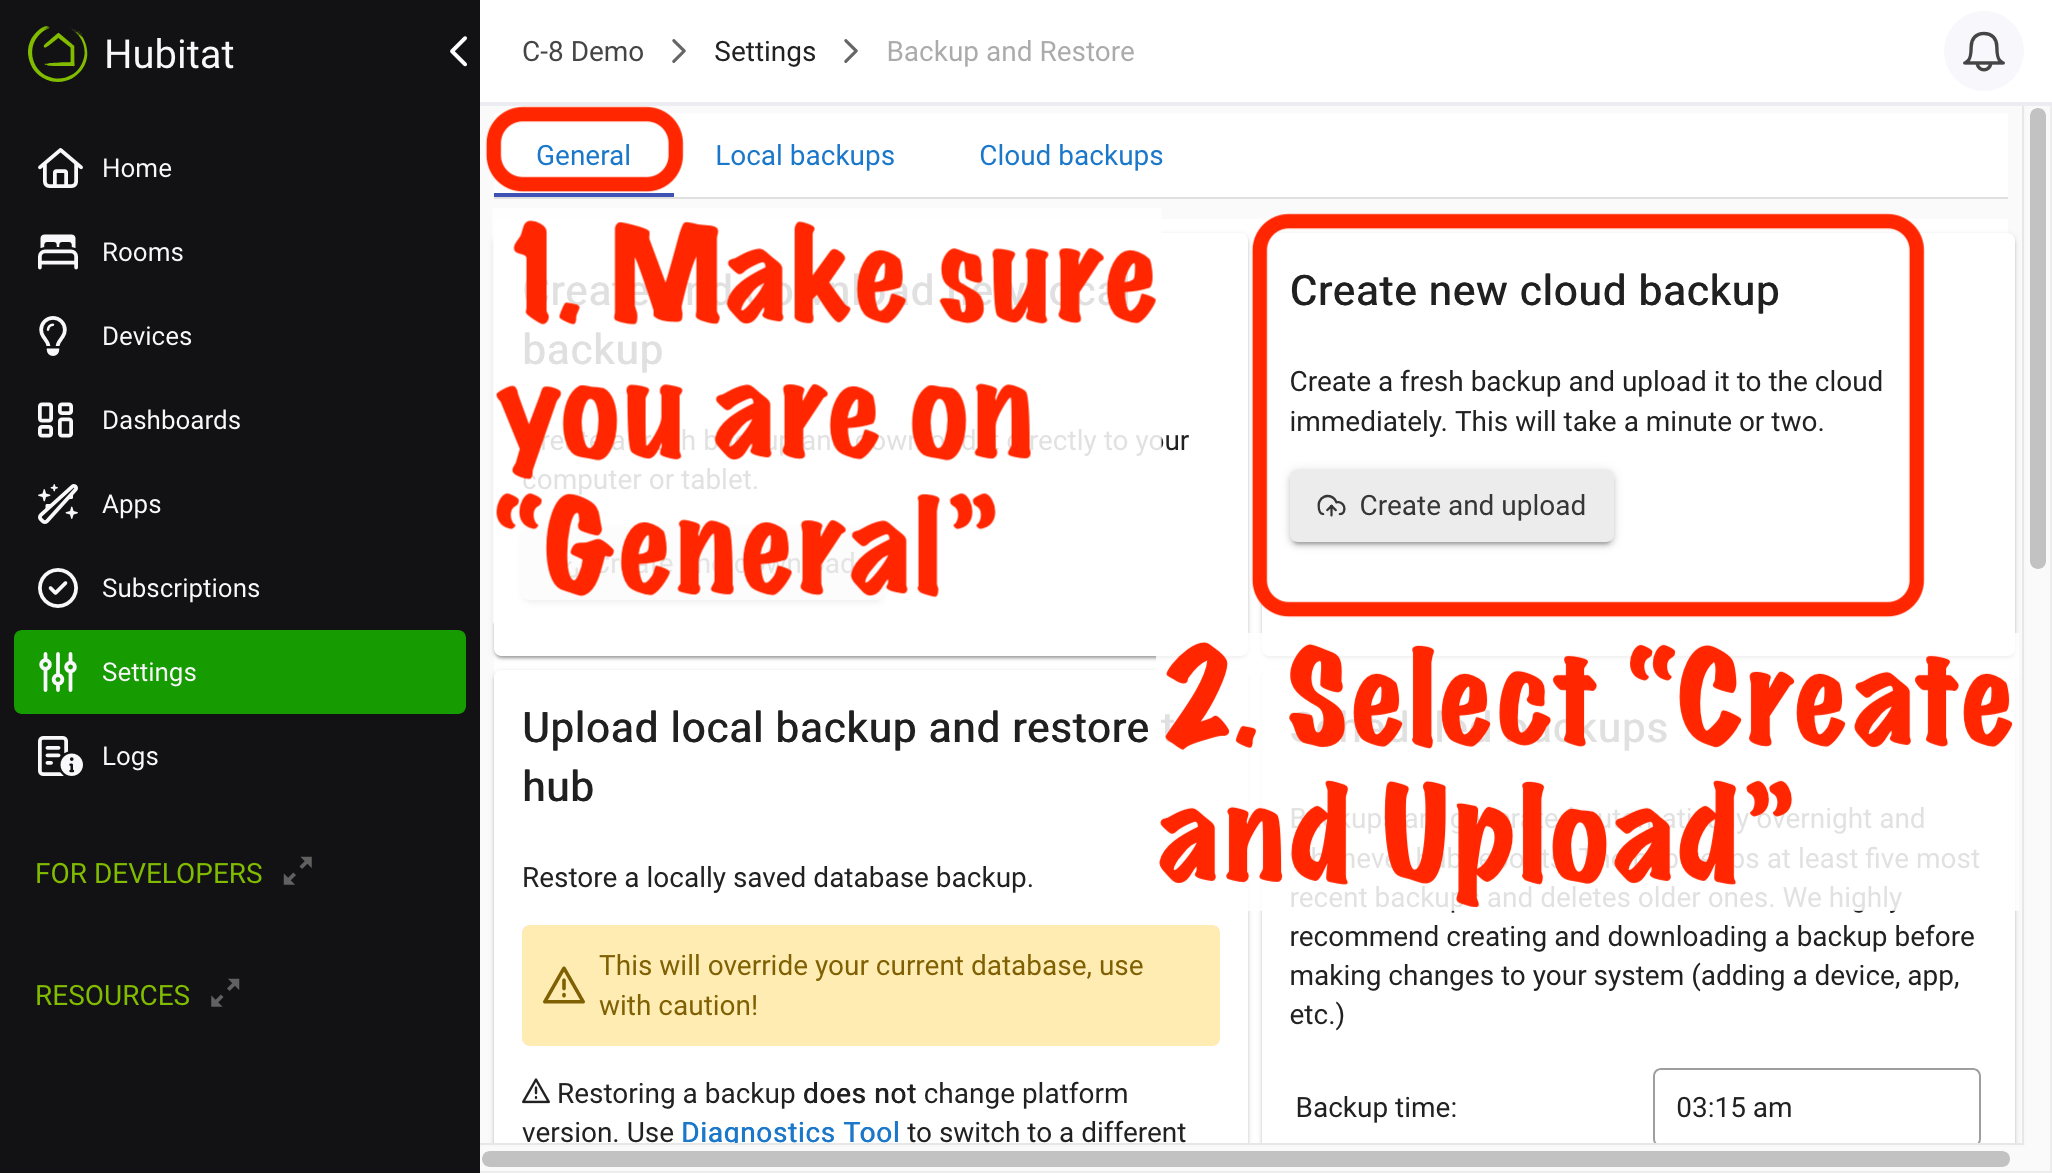
-
If you have not already registered the new hub, you'll need to complete that before proceeding.
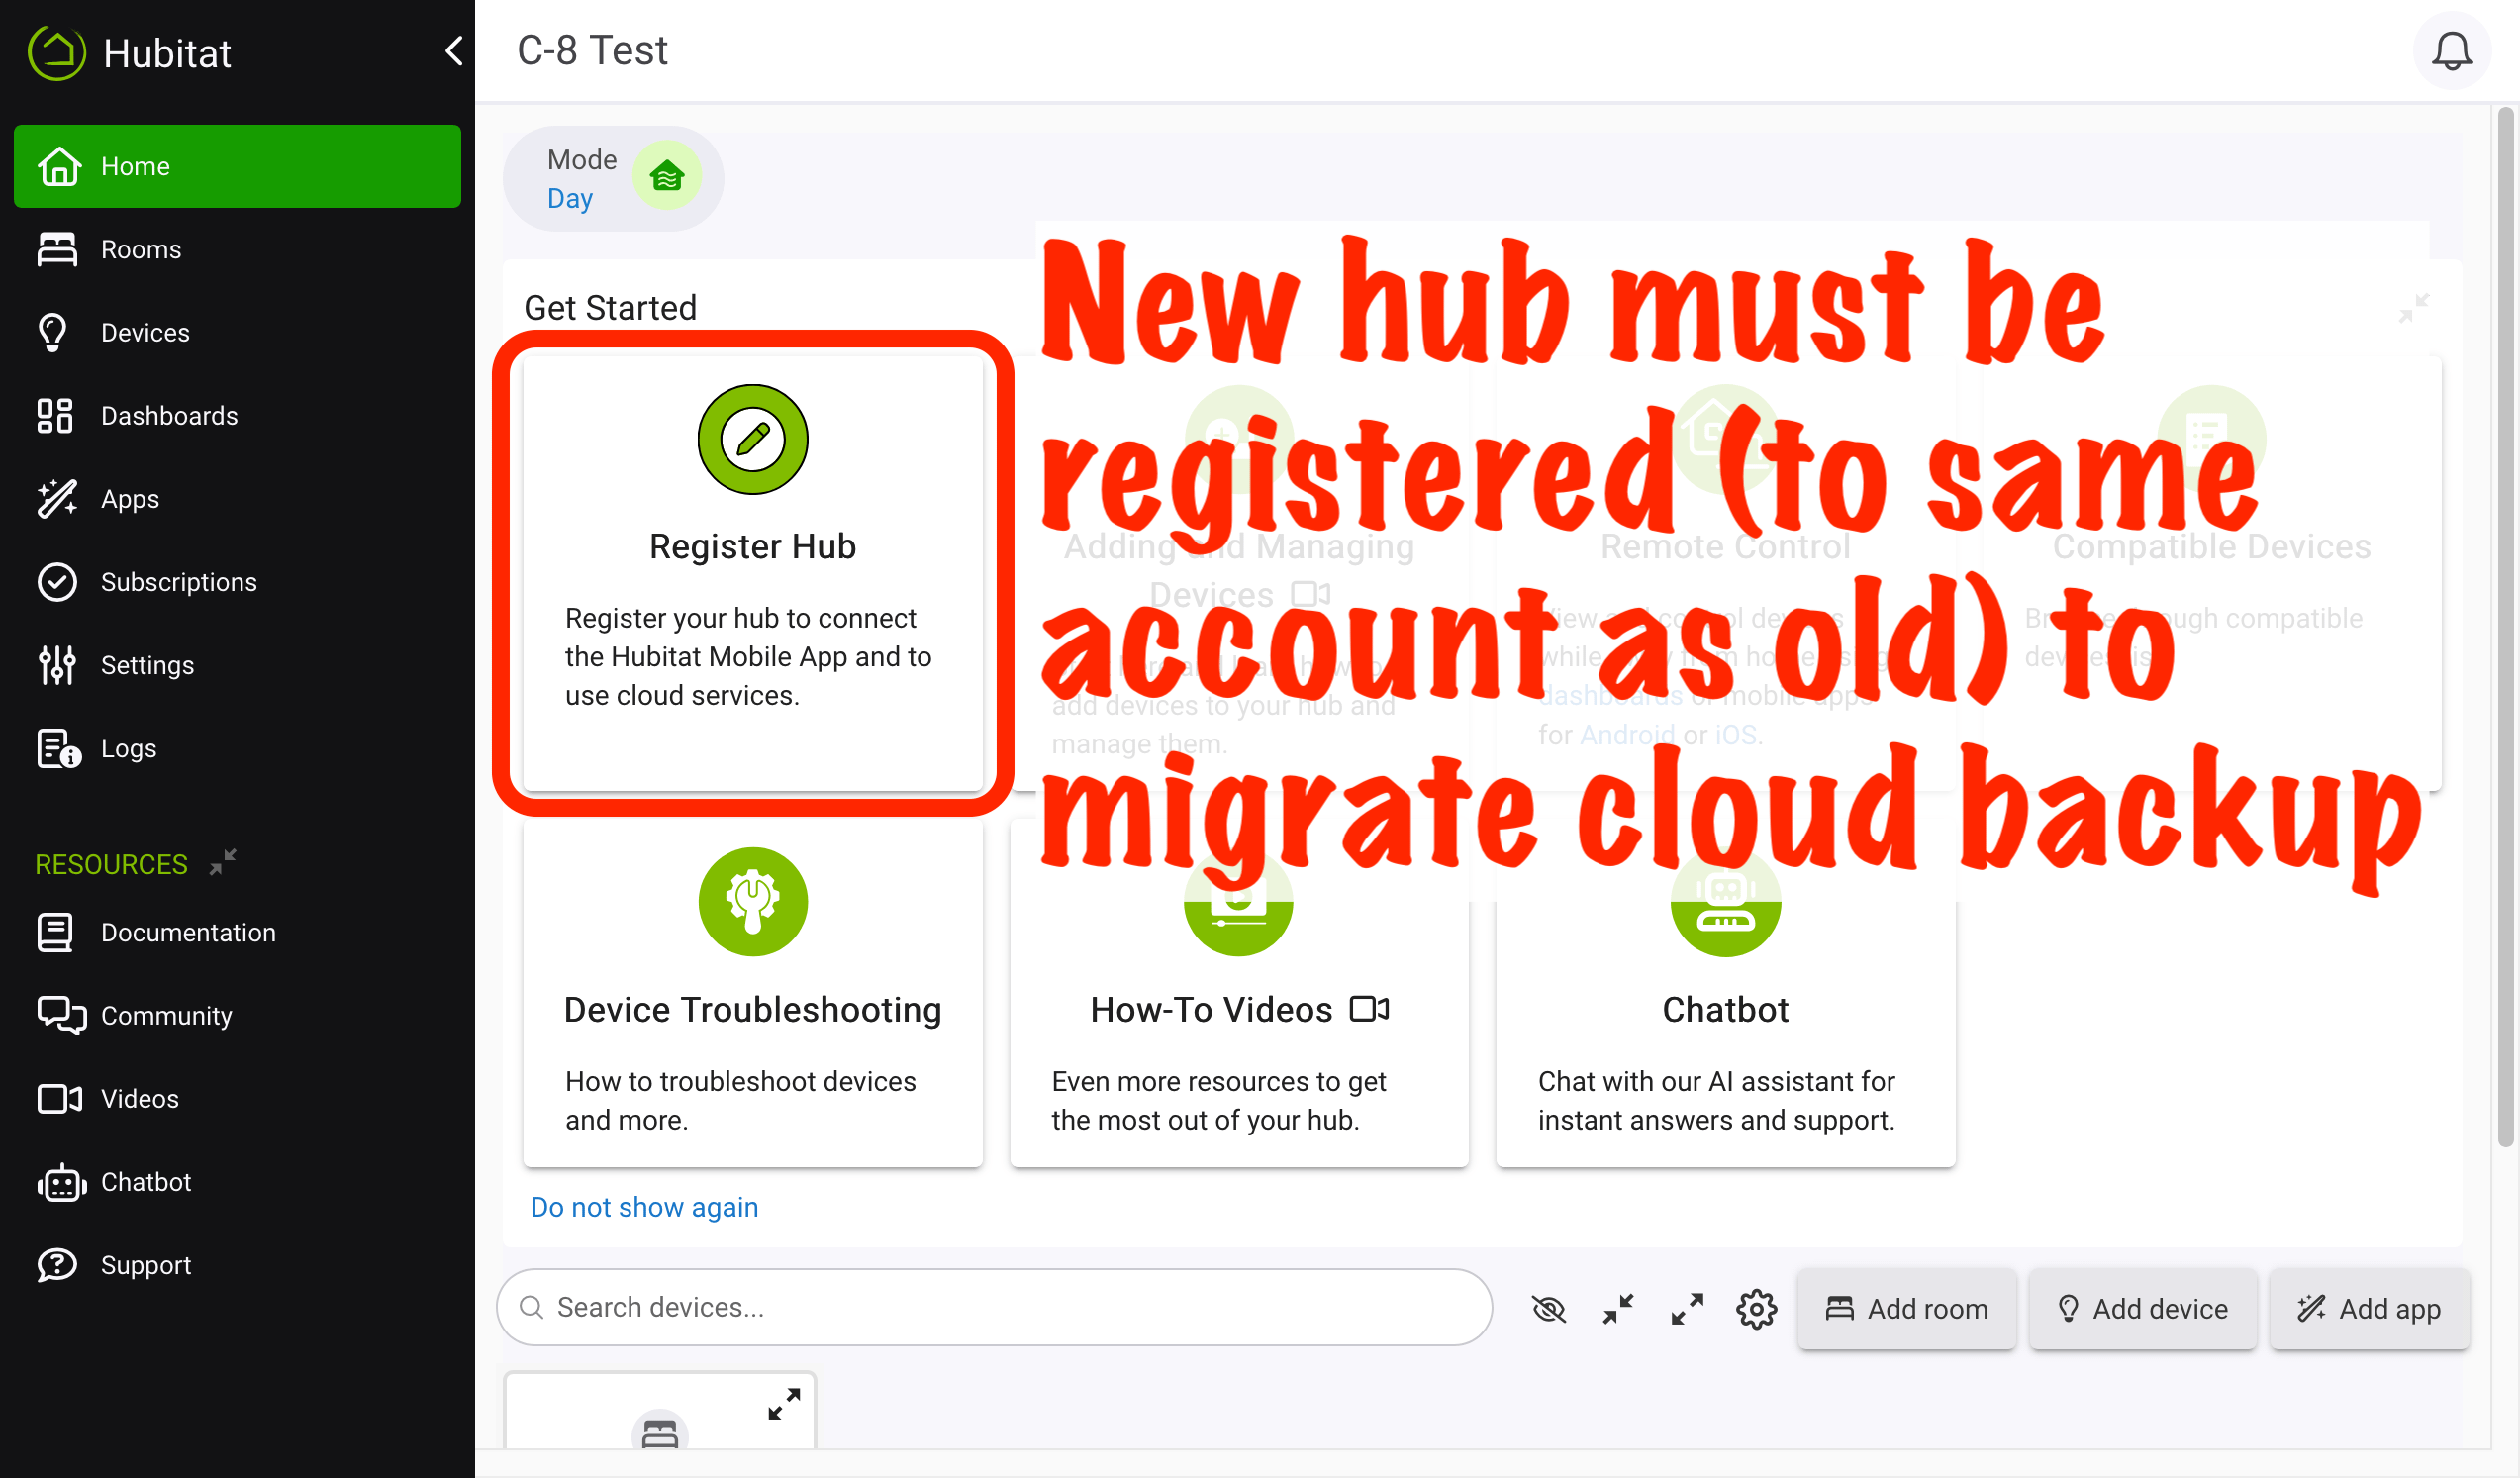
-
Once you have completed registration of the new hub, please reboot it before continuing to the next step.
-
When your new hub has completed the boot sequence and is online, navigate to Settings from the sidebar and select Backup and Restore.
-
Select the migration-ready backups (model C-8 or C-8 Pro only) link or the all backups link (any model hub) in the Show all backups or... heading.
-
Find the backup created above (or the most recent cloud backup) in the list (it will show "cloud" or "migration" in the "Type" column and the name of the hub in the "Name" column). Select the
 Migrate icon under the Actions column for this backup.
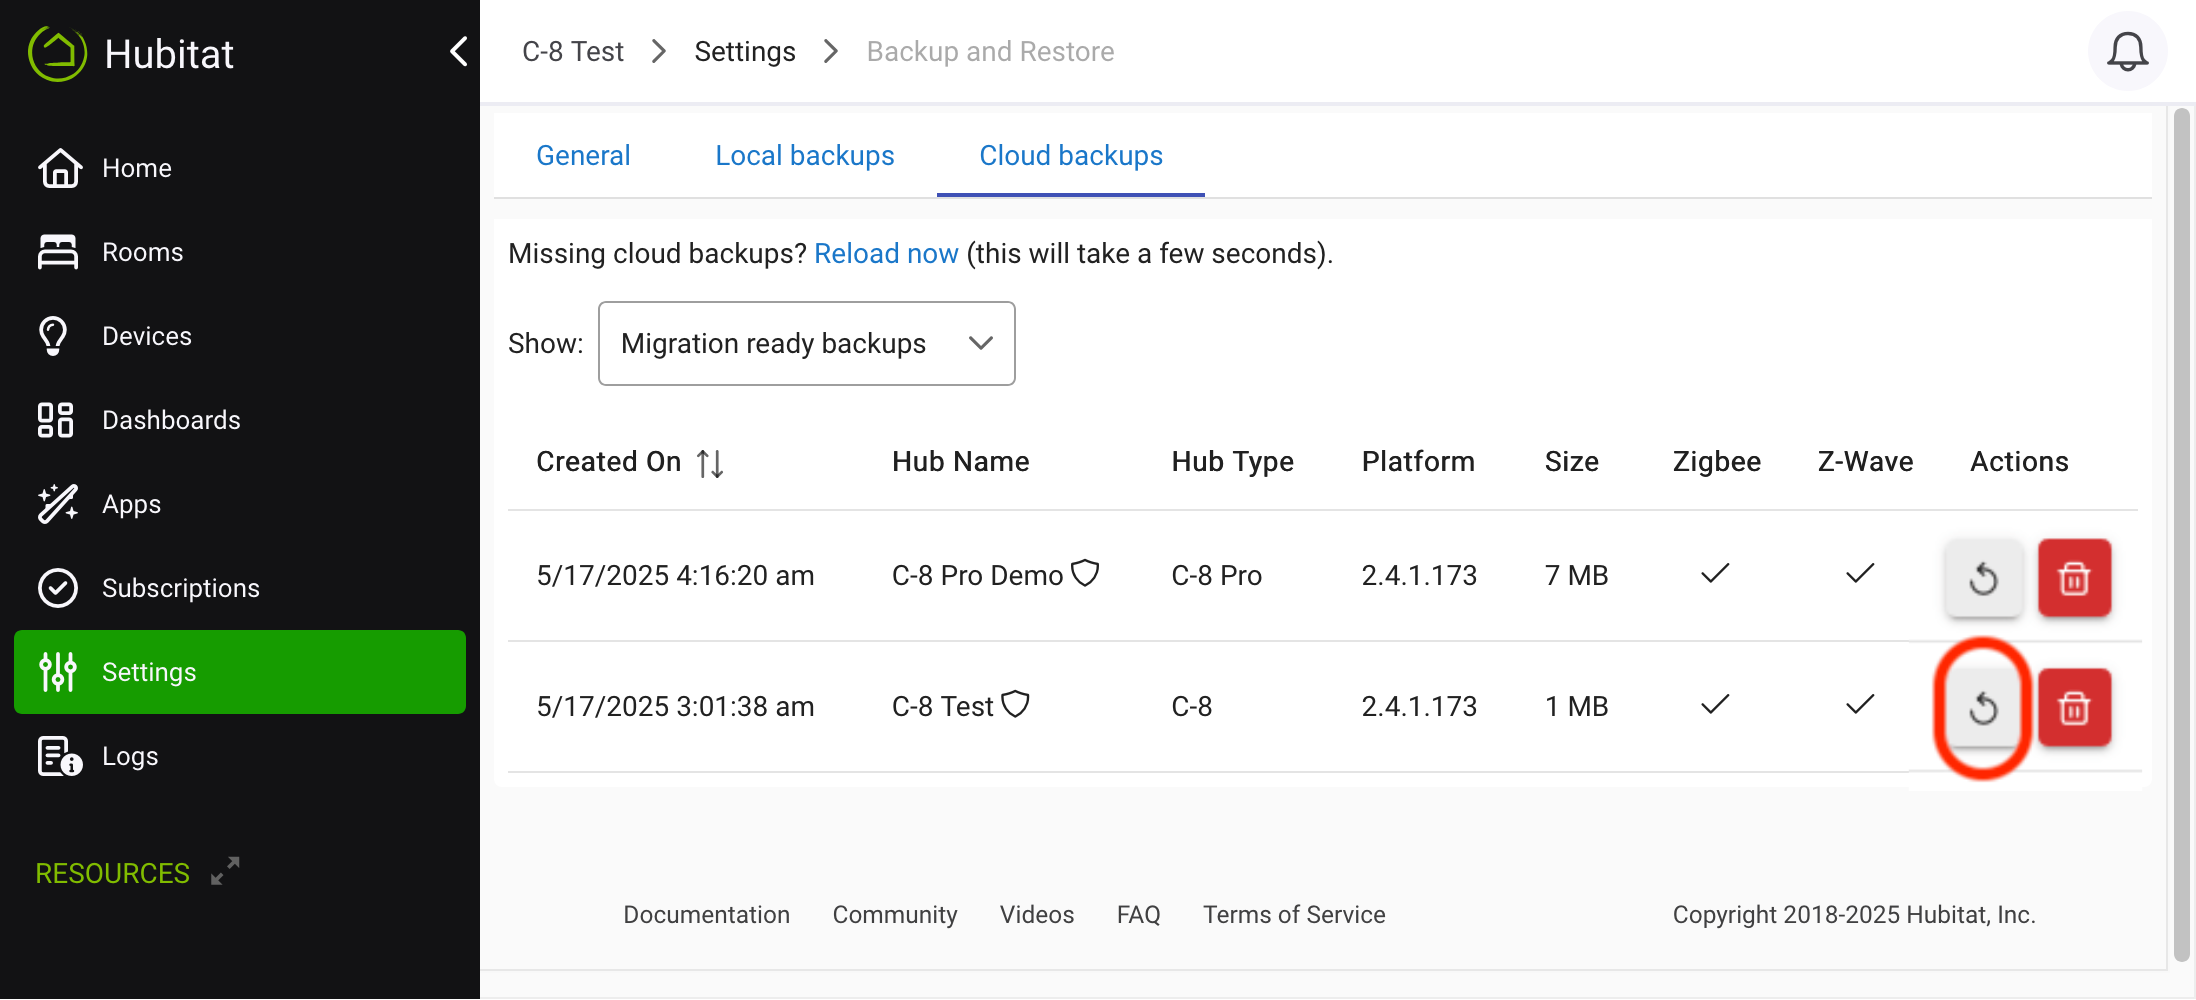
-
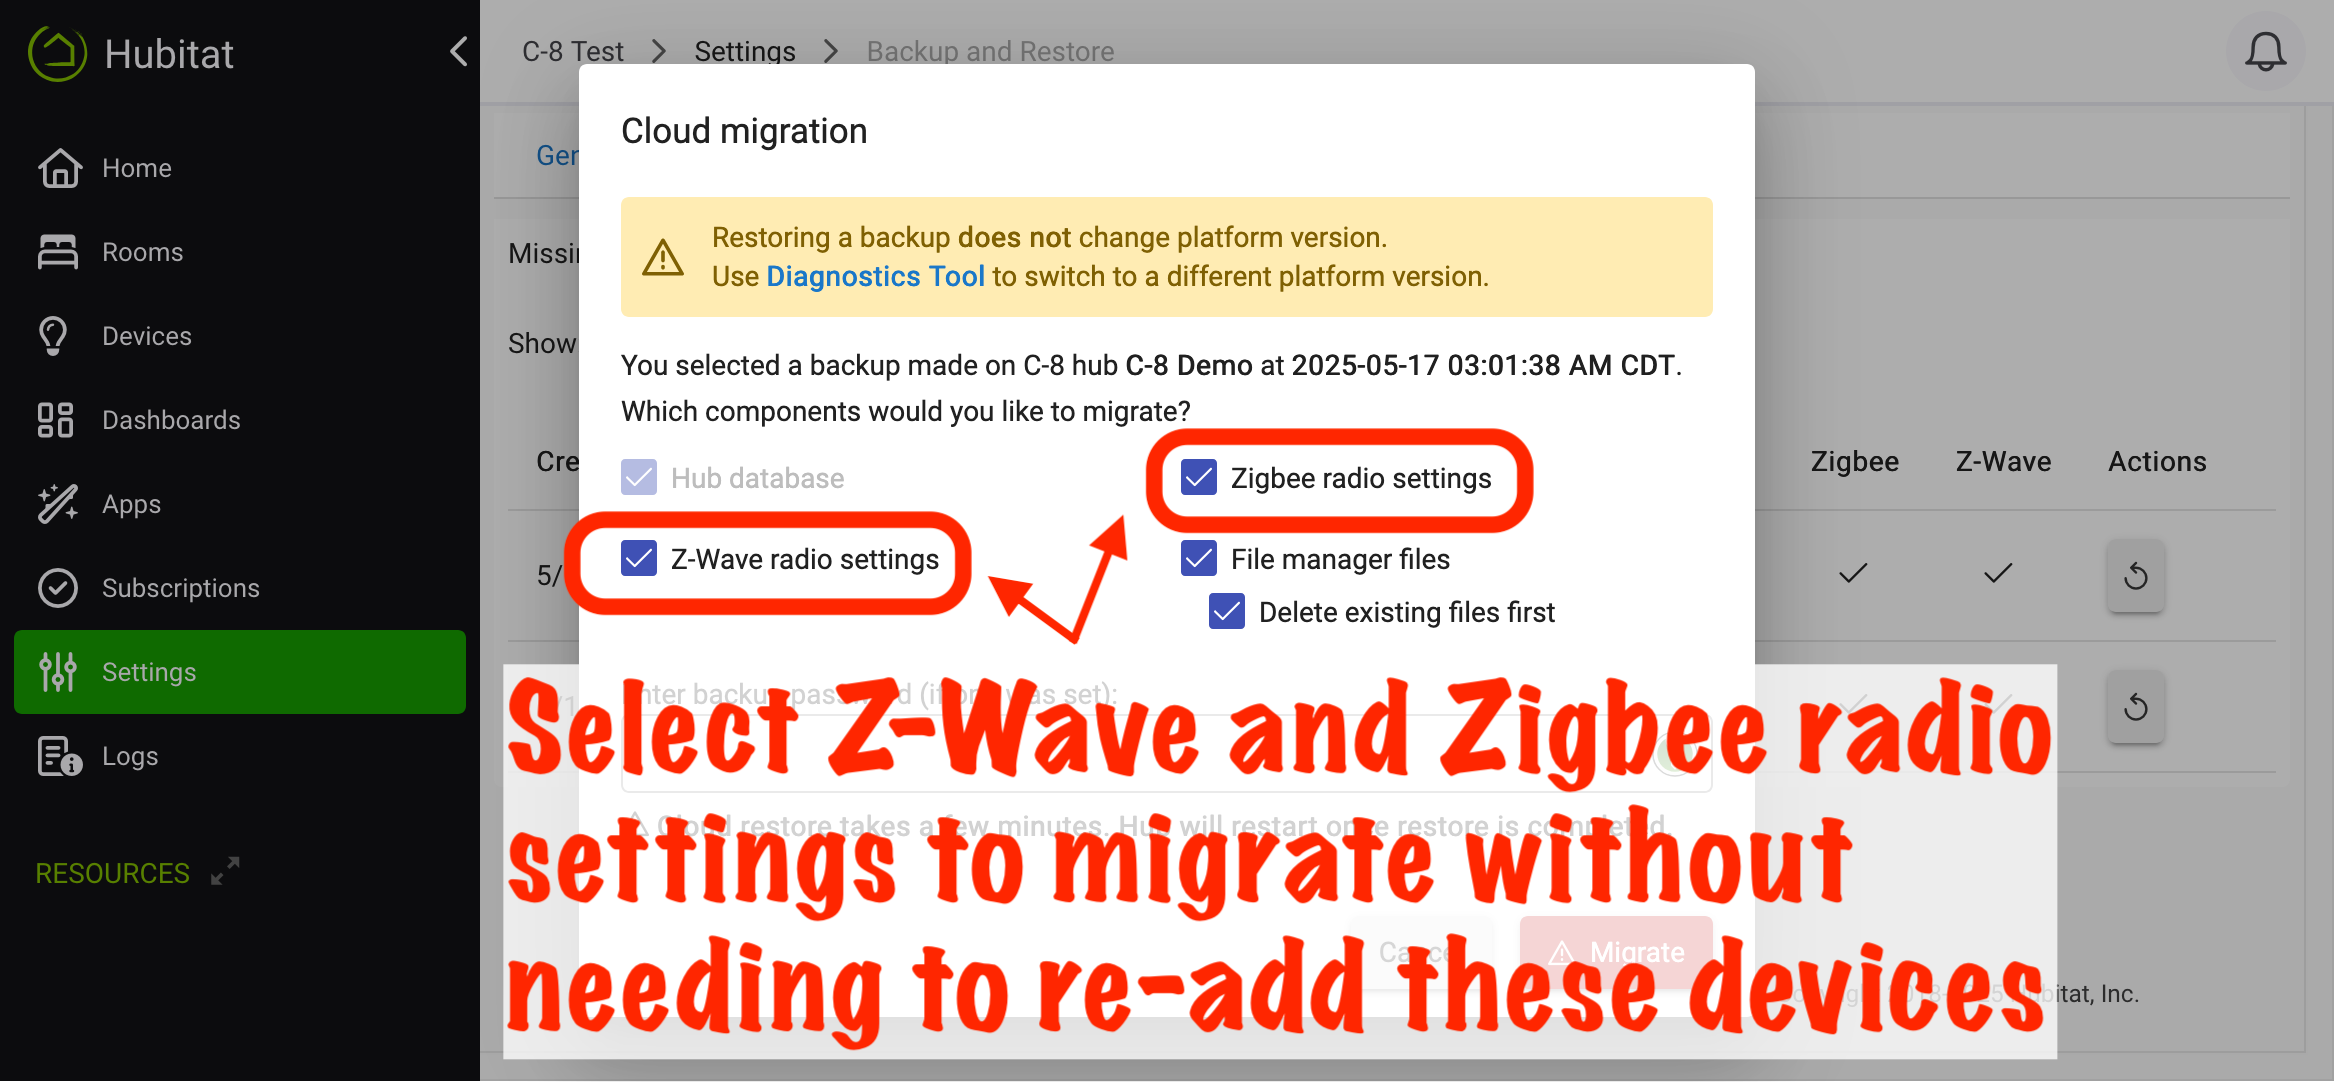
When prompted, select the options to Migrate Z-Wave Radio, Migrate Zigbee Radio, and Migrate File Manager (or whatever your preferences are; selecting all enables you to transfer your Z-Wave and Zigbee devices from the old hub without the need to manually re-join each device to the new hub).
-
Shut down the hub you are migrating from as soon as possible after completing the backup and before selecting the Migrate button on the new hub. (After the migration to the new hub is complete, you may again start up the hub you migrated from, but the Z-Wave radio should remain disabled or reset, Zigbee must remain disabled or reset and used on a new channel, and you may additionally wish to soft reset the old hub — never before verifying that the new hub works correctly).
-
Allow the database migration process to complete.
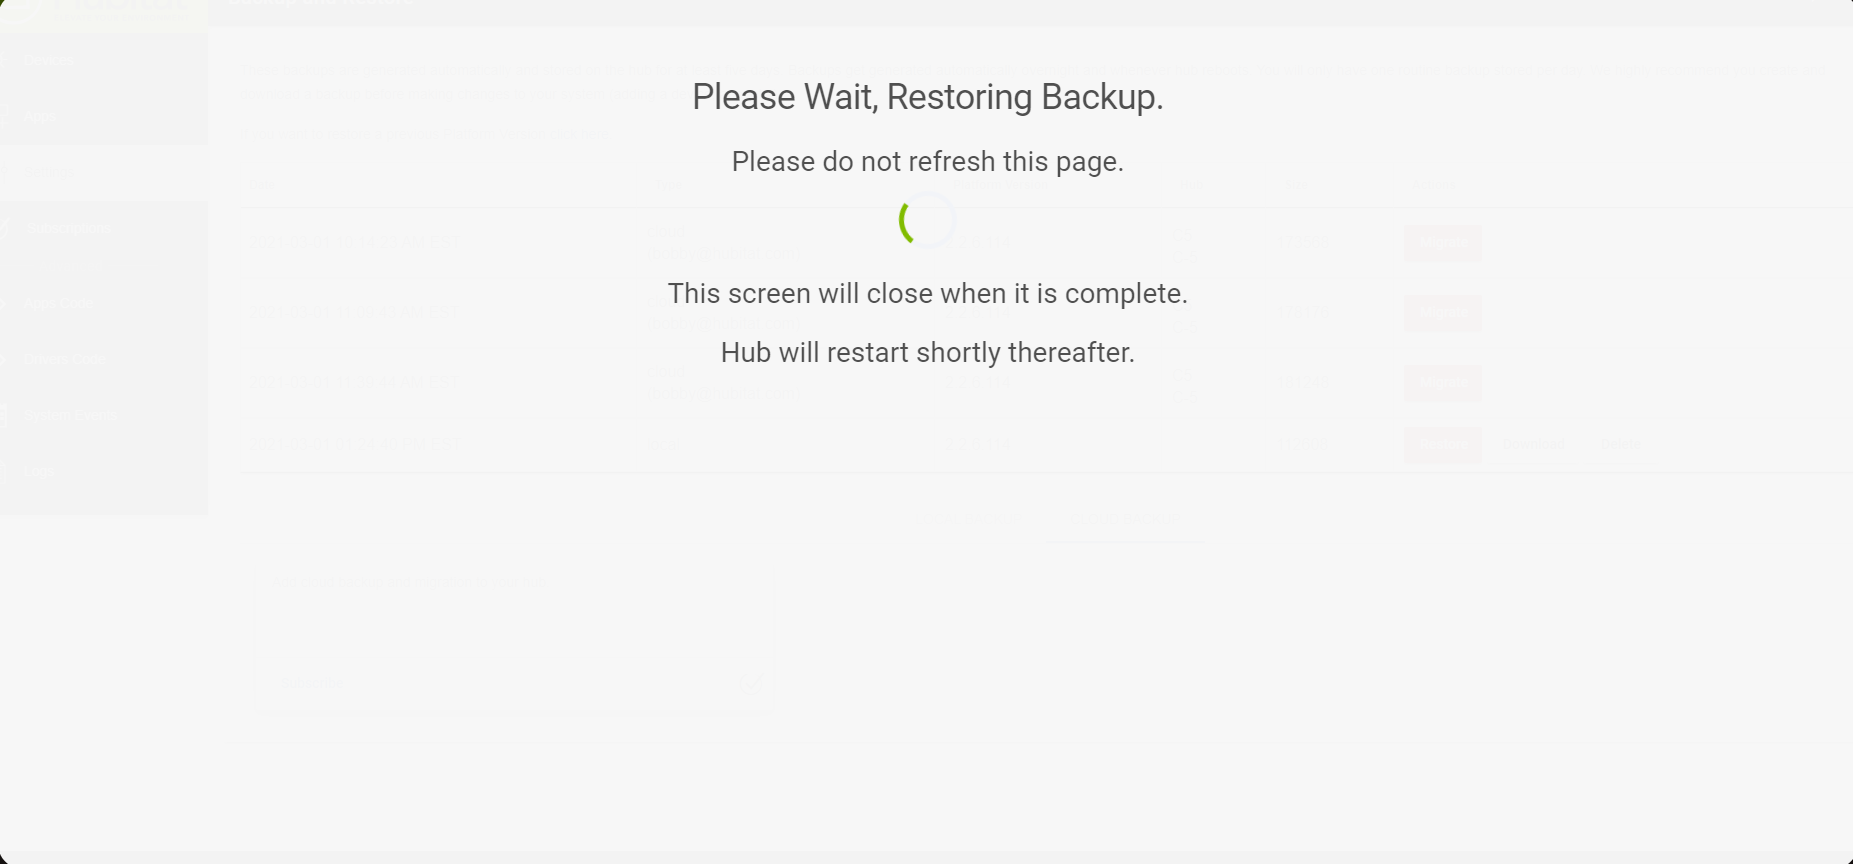
-
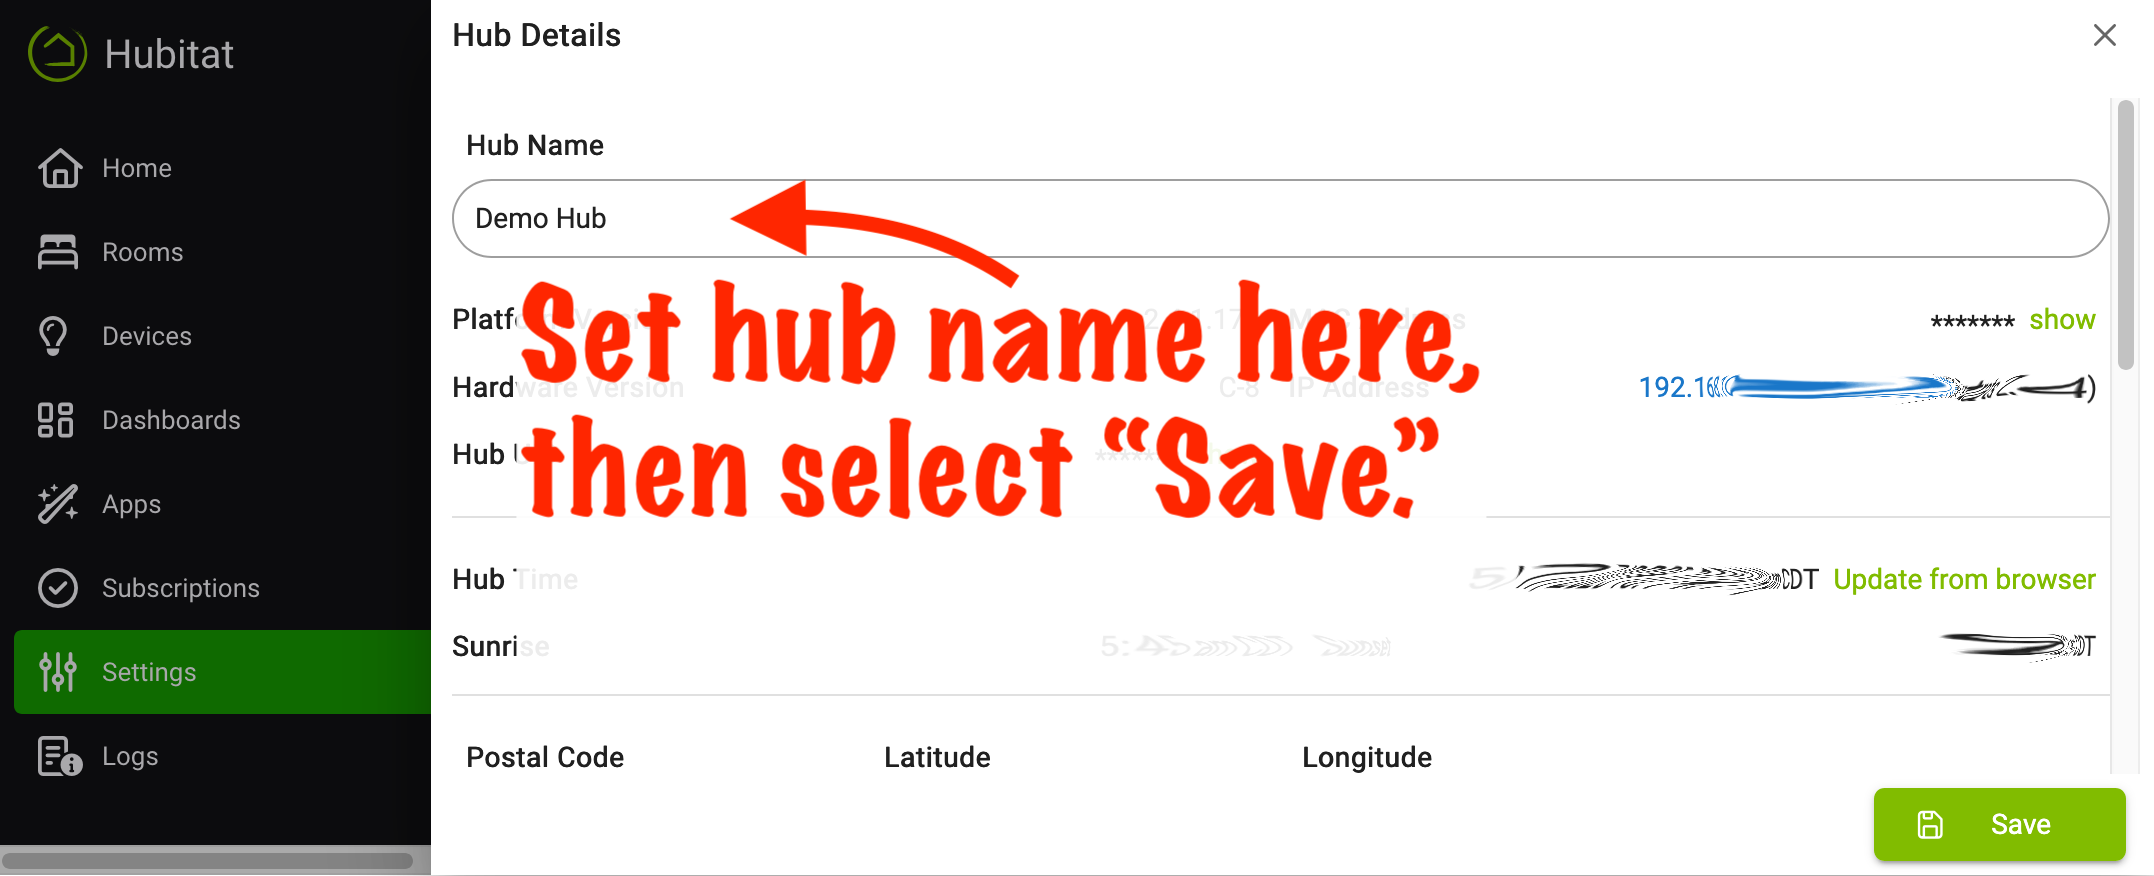
When the process has completed, the location name will be set to [Your old hub name] (new). We suggest navigating to Settings > Hub Details and choosing a different name for your new hub to avoid confusion (be sure to select Save Settings when done):
Hub Protect or Cloud Backup Migration Notes
If you migrate from a hub that is subscribed to Hub Protect or Cloud Backup to one that is not covered by a Hub Protect or Cloud Backup subscription, you may choose to add a new Hub Protect or Cloud Backup subscription to that hub to the "new" hub to also enroll it for the same benefits. Hub Protect or Cloud Backup subscriptions may be canceled any time and will remain active until the end of the original subscription period. Alternatively, you can manually transfer an existing subscription from one hub to another hub:
- Visit my.hubitat.com and navigate to the Registered Hubs page.
- Find the subscribed hub in the list; any hub with one or more active subscriptions will appear with a Transfer subscriptions link below it.
- Select the Transfer subscriptions link for the hub with the subscription you would like to move to. Once there, you will be able to select the hub you would like to transfer the subscription to (the destination hub). Select Transfer now to start the change.
Upon transfer, any existing cloud backups that have been created for the old hub will be permanently removed from the server and no longer be recoverable. After the services are transferred, you may need to perform a "Reload backups" operation on the destination hub. From Settings, navigate to Backup and Restore, then select Reload backups now.
Supported Migration Paths
Similar to local backups, cloud backups — including apps, the device list (but not necessarily Z-Wave and Zigbee device functionality), custom code, hub settings, etc. — can be migrated from any hub model to another. File Manager contents also migrate (platform 2.3.5 and newer only) if selected during restoration, subject to a 100 MB limit
Z-Wave migration is supported to any hub model C-7 or newer from any hub model using internal radios, as long as it is the same or newer model as the hub being migrated from. This includes migration from:
- any hub C-7 or newer
- any C-5 hub if using the internal radio (the default configuration for North America)
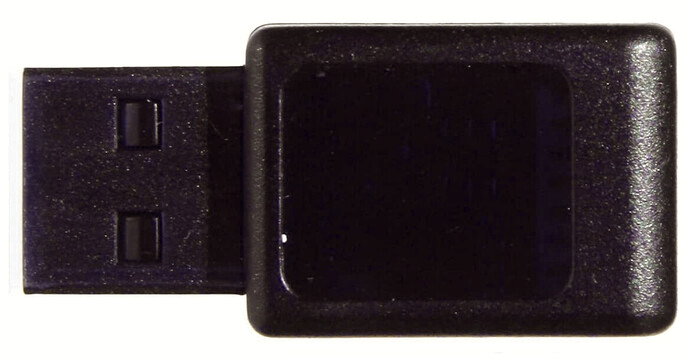
- certain C-5 or older hubs if the external Z-Wave adapter in use us the Z-Wave.me adapter (other adapters are not supported):
If you are migrating from a model C-5 hub and plan to migrate Z-Wave, you should perform a Z-Wave Repair before uploading the cloud backup that will be used to migrate.
Zigbee migration is supported to model C-8 or C-8 Pro if migrating from:
- any hub C-7 or newer
- any C-5 hub if using the internal Zigbee radio
If restoring a backup to a model C-7 or older, where Zigbee restoration is not supported (or if you chose not to automatically migrate Zigbee), your devices will remain in the Devices list and can be re-added without needing to manually swap old and new devices with some additional work. This is not necessary when migrating Zigbee to and from supported models:
- Do not remove the "old" device from your Devices list.
- Navigate to Devices > Add Device > Start Zigbee Pairing
- Reset the Zigbee device or put it into pairing mode.
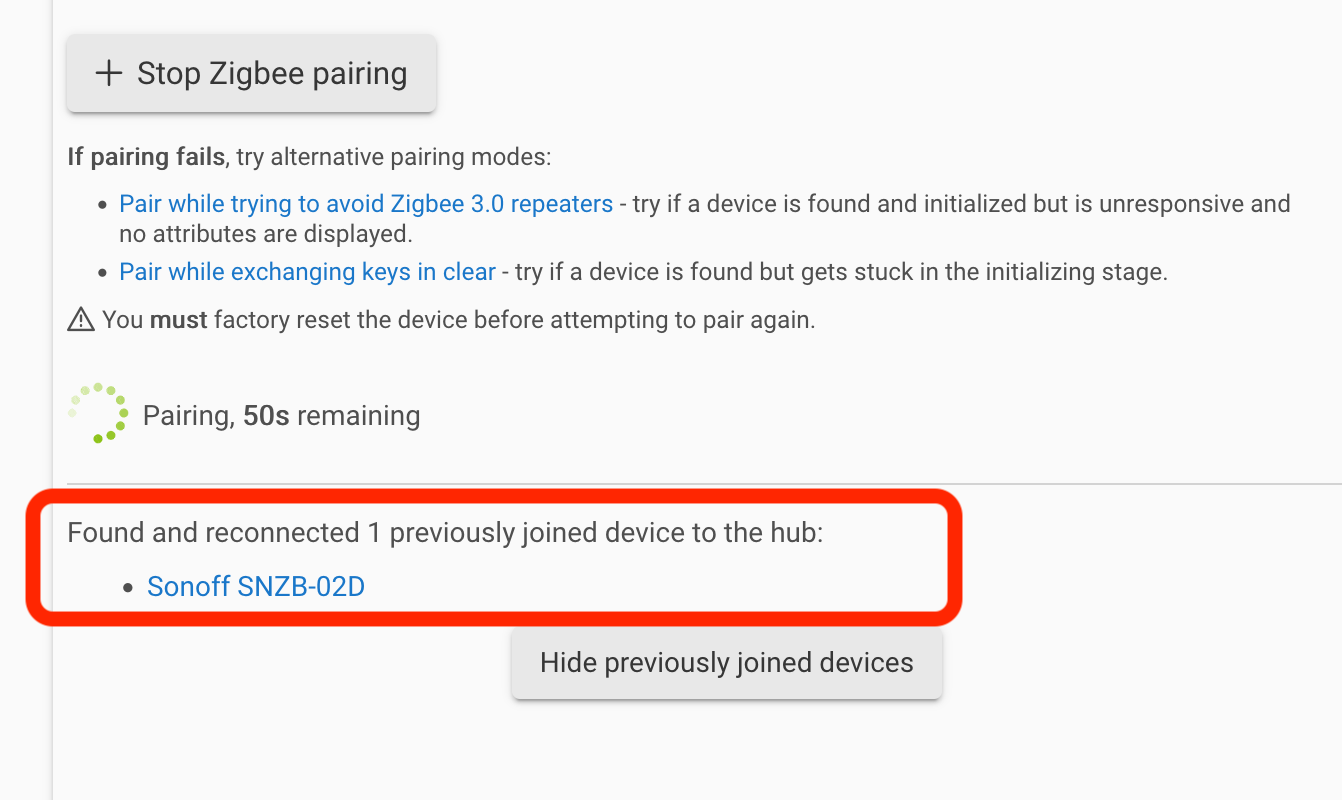
- After a few seconds, the device should be re-discovered as the existing/old device, as shown below:
- That's it! The device should resume normal operation. (For Zigbee groups in Groups and Scenes or Room Lighting, you may need to open the corresponding apps and select Done to re-establish the group membership.)
Important: Restoring a backup from an older hub model to a newer model may result in certain devices no longer functioning properly if they are not compatible with the new hardware or underlying radio/firmware architecture. While most devices and automations should restore normally, some legacy Zigbee, Z-Wave, LAN/cloud, or custom integrations may require re-pairing, driver updates, or additional configuration after migration. Compatibility can vary depending on device model, firmware, and integration method.